
I spent time over the early part of winter looking at equipment for bikepacking and touring in 2015. I bought pretty much everything I need and was able to snag some items at off-season discounted pricing.
The Revelate Designs gear however, largely due to its limited supply and high demand, required me to pay pretty much full retail. And this stuff ain’t cheap.
Revelate Designs Sweetroll
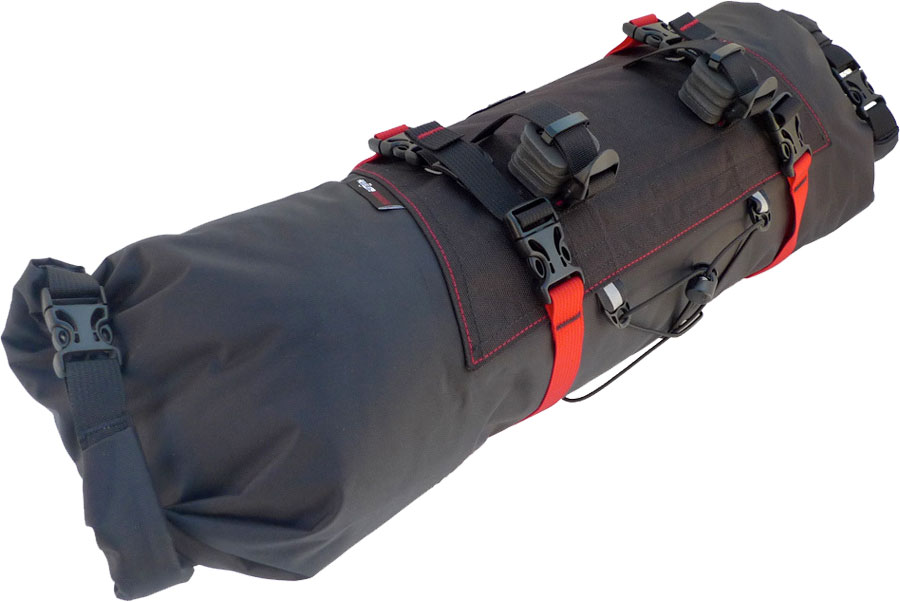
The Sweetroll is basically a bikepacking bag designed to be stuffed with gear and suspended from the front of the bike, lashed to the handlebars and secured on the frame/headset. It comes in different sizes, size variants affecting length and diameter. Revelate Designs recommend the Large size for use with drop bars. The larger sweetroll is 8″ diameter and 22″ long, potentially. Basically with a drop bar setup the bag needs to fit inside the drops, so you’ll cinch it down to whatever size your bars allow.
Here are the specs from Revelate Designs [website]
- Weight:
- Weights are complete and without front flap
Small – 12.5 oz / 10.3 oz Medium – 13.2 oz / 11.0 oz Large – 14.0 oz / 11.8 oz - Volume:
- Small – 5.75″ diameter x 23″ max width – 600 cu in Medium – 7″ diameter x 22″ max width – 850 cu in Large – 8″ diameter x 22″ max width – 1,100 cu in.
- Features:
- 200 denier TPU coated nylon
500 denier PET laminated Cordura Nylon
Rhinotec
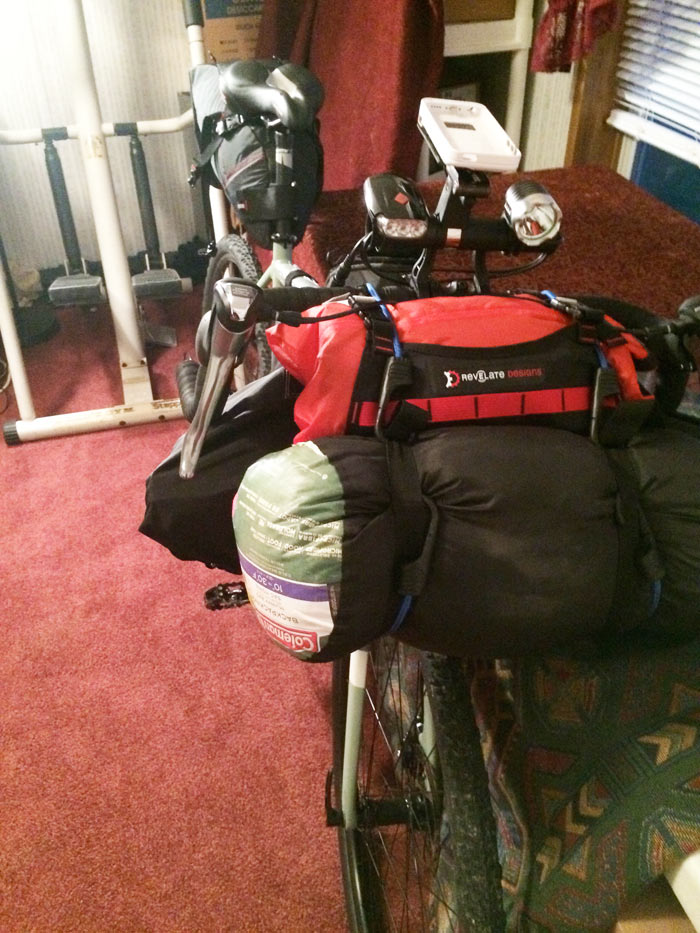
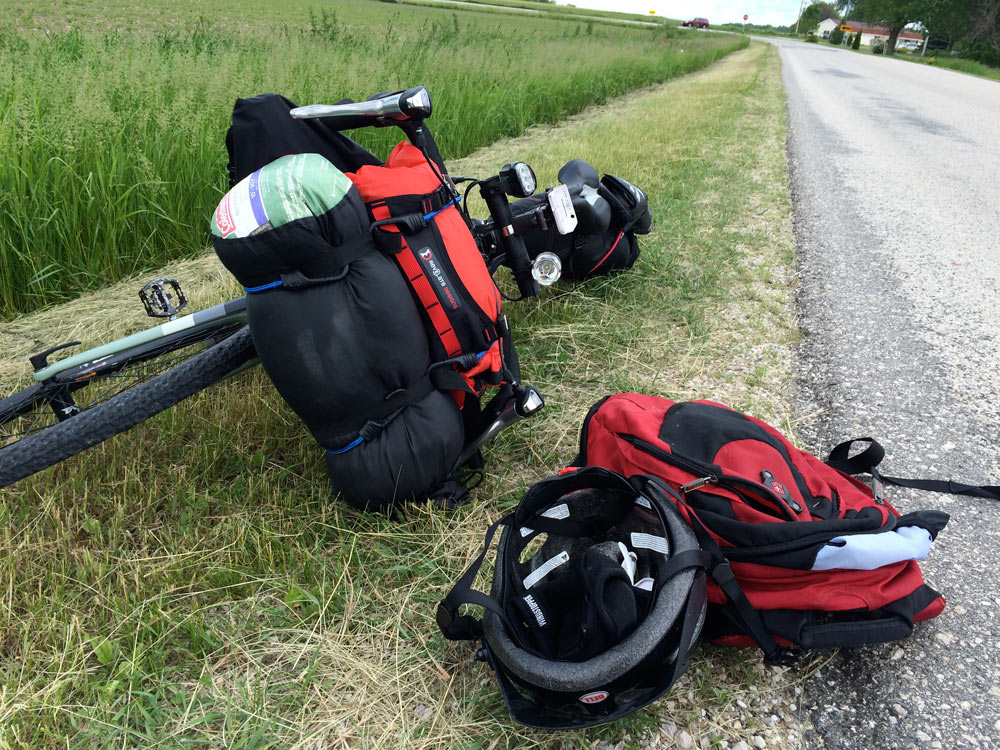
Since a picture paints a thousand words, let’s have a look around this puppy to save on ink –
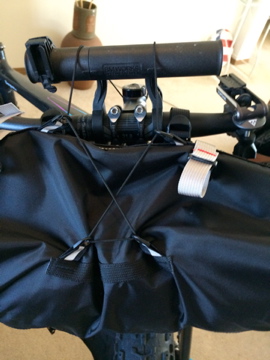
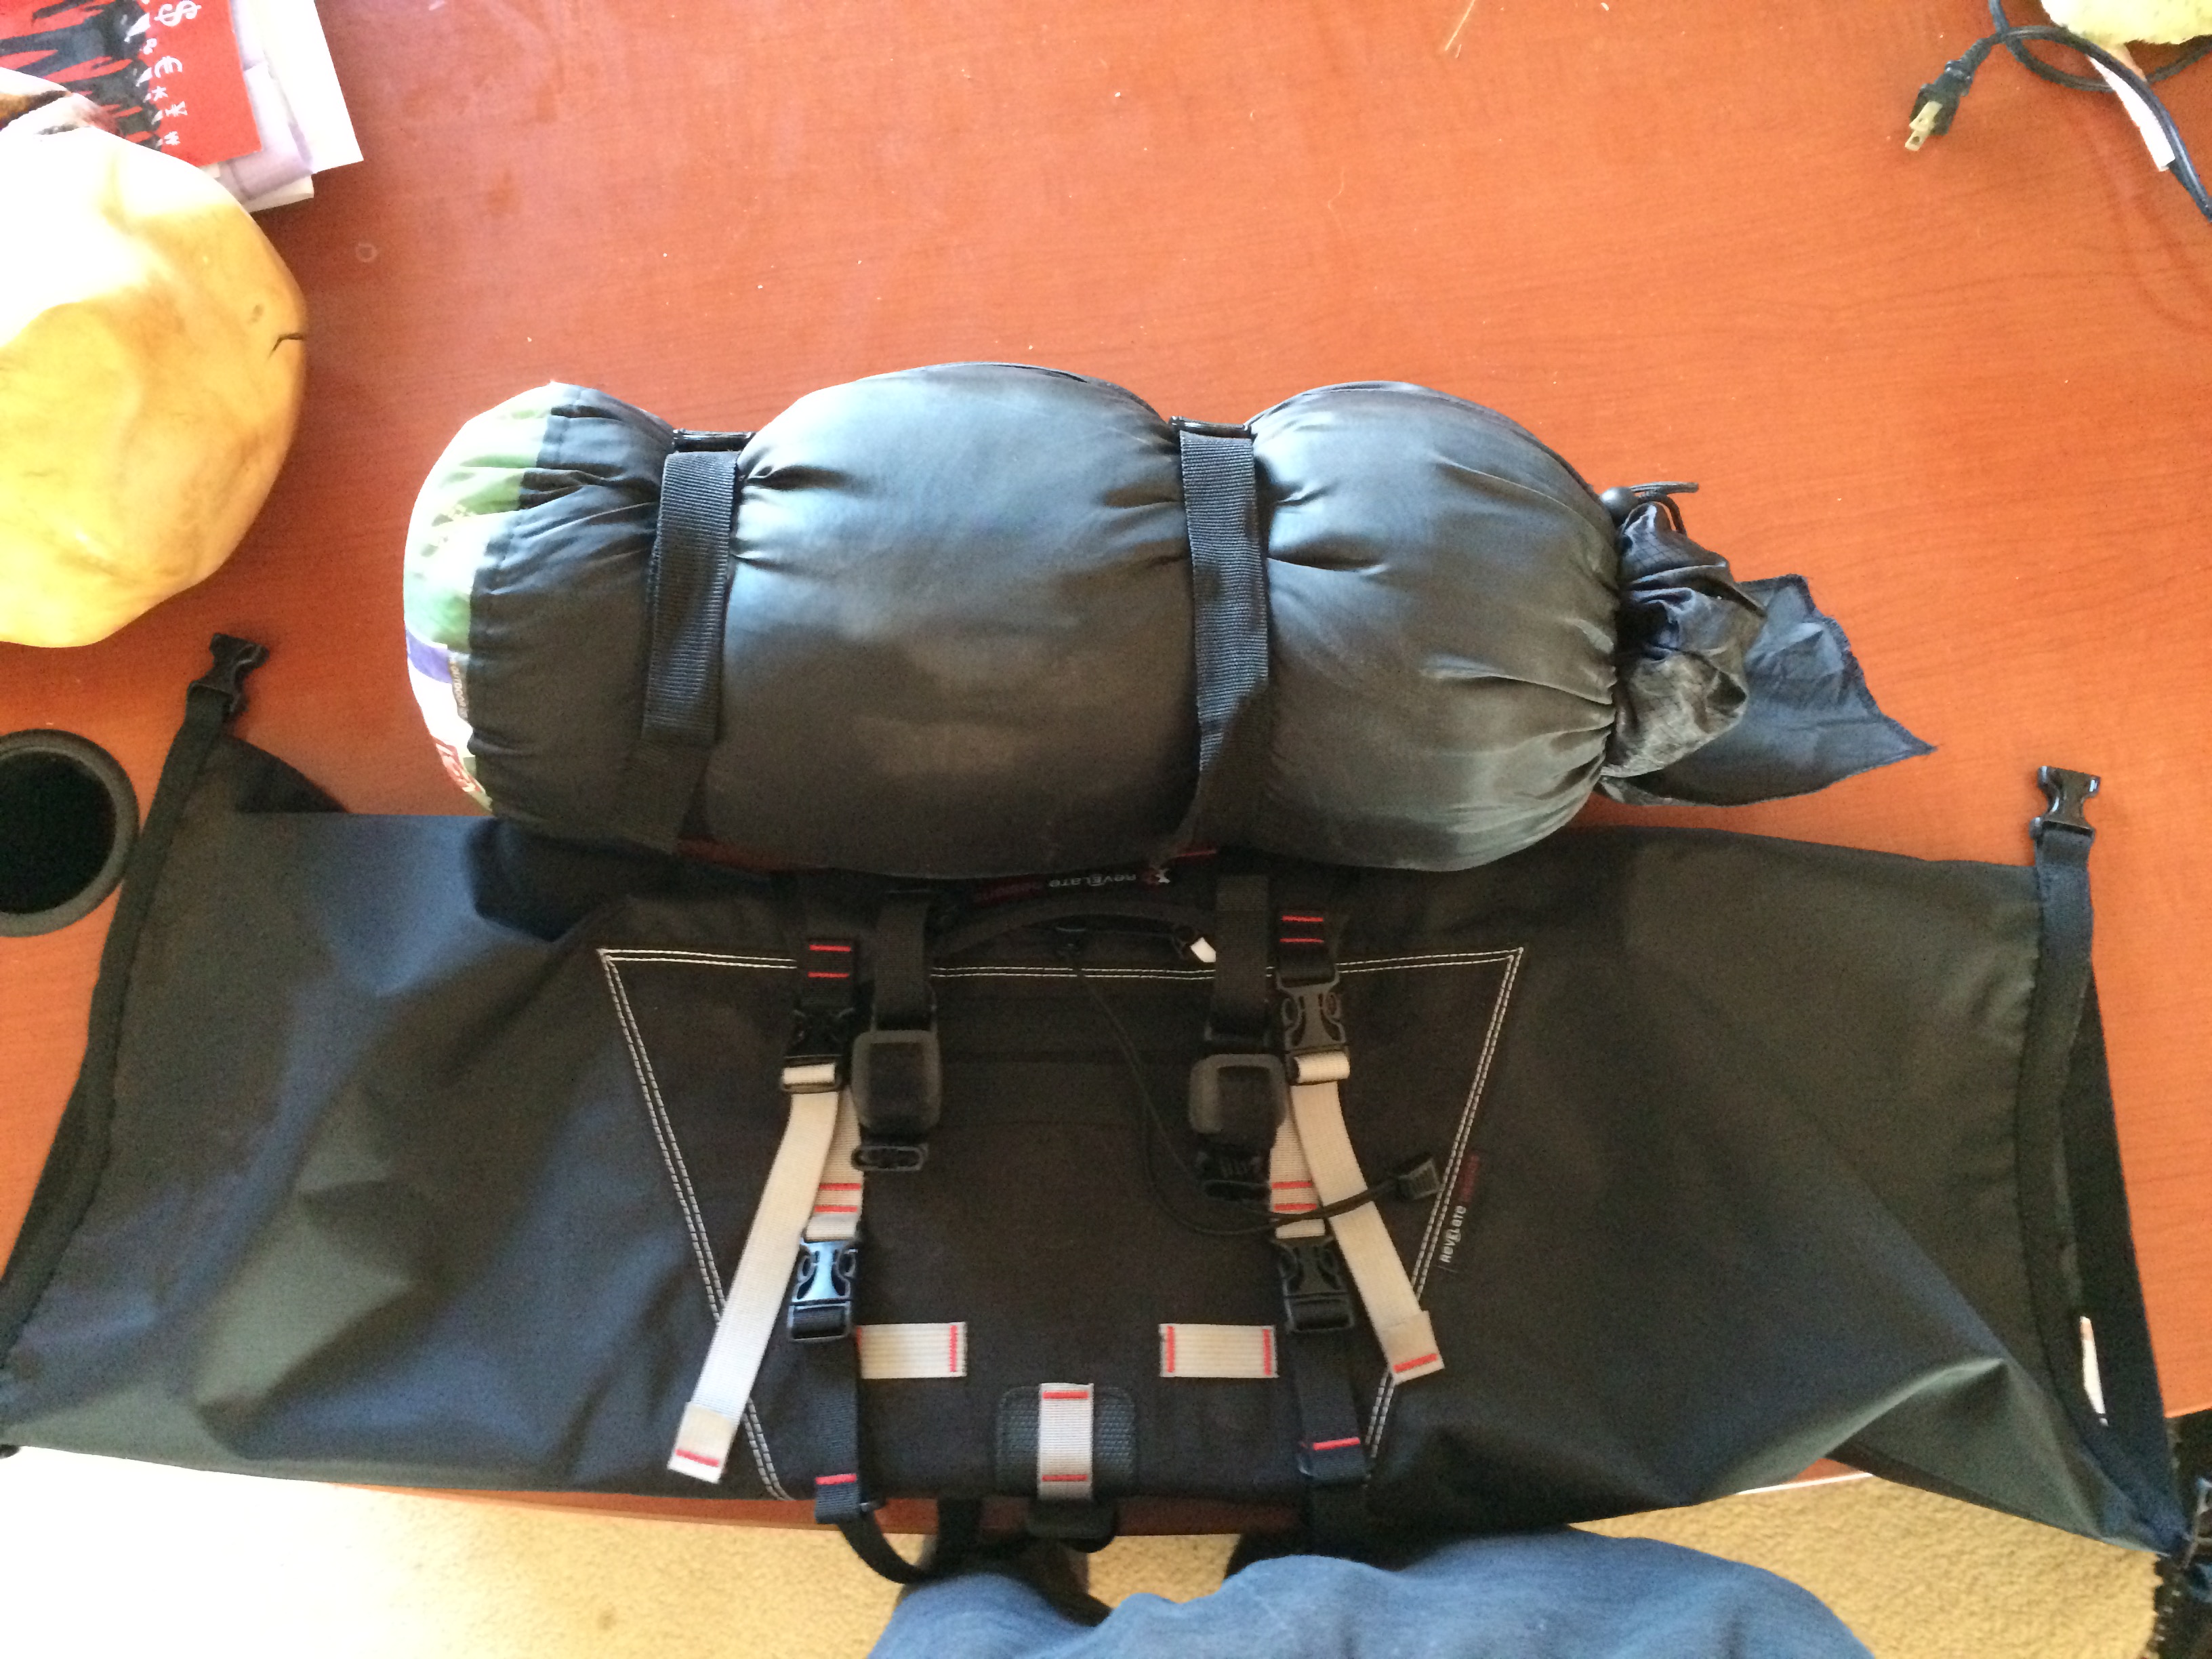 Above is the view from the top of the bag. There are handy attachment points on the front and I’ve attached a sleeping bag so you can see it in action.
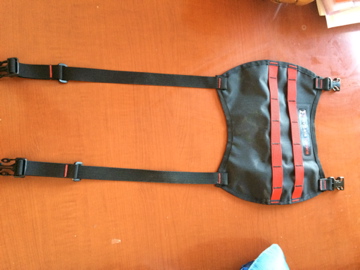
Here’s the front section, a removable/expandable harness system for adding other stuff to the front of the Sweetroll using dry bags –
I think the build quality of the Revelate Designs Sweetroll is incredible. It looks sturdy and durable and it seems to be very well thought out, until you actually try and use it.
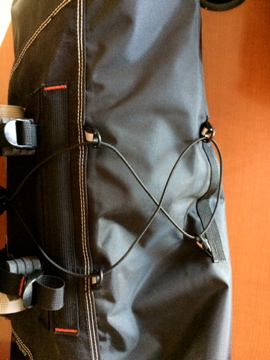
I hate the ends of the bag and the buckle fasteners. There’s no easy way to vary the amount of gear you put inside the bag and close up the ends tightly and effectively. You should be able to clamp down the ends tightly, and in doing so, lock the gear down inside the bag. But with the buckle system you just can’t do that. You close the buckles and unless the sweetroll is packed to full capacity the gear inside will shift around. So I ended up using bungee cords to close up the ends and clamp everything into place. That just looks like crap, and actually, it is crap.
You can see the buckle system below. It’s the same design taken from your typical camping supply dry sack makers. It’s fine with a dry sack as one end is sealed, but when both ends are open, as is the case with the Sweetroll, it’s a pain in the lower cassock.Folding over the straps on the ends and using the buckles is madness. It secures nothing in place inside the bag. I have my tent inside the bag and it just slides to one side and unbalances the load on the front of the bike. It’s going to be even worse with drops. Surely anyone can see this this isn’t effective?
The bag should have adjustable straps that go from the buckles on the ends down the length of the bag, so everything can be cinched down tightly.
You can see in the above photo that the manufacturer provides you with little foam spacers to space the bag off the bar in small increments. I tried these and thought they basically just make the whole thing less stable, so I dispensed with them.
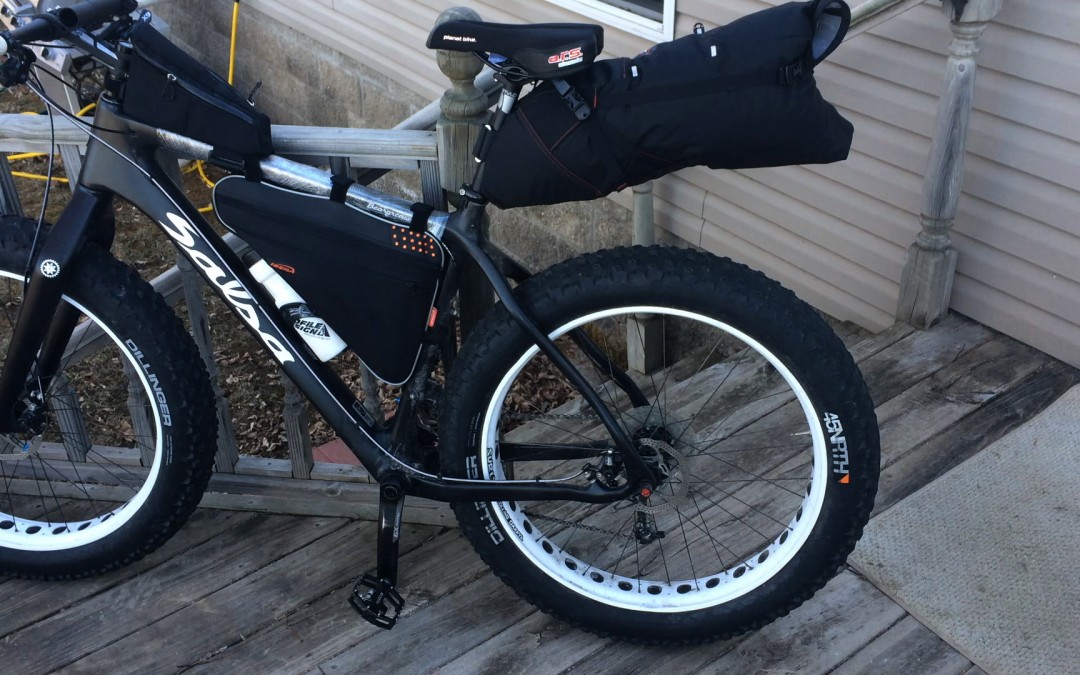
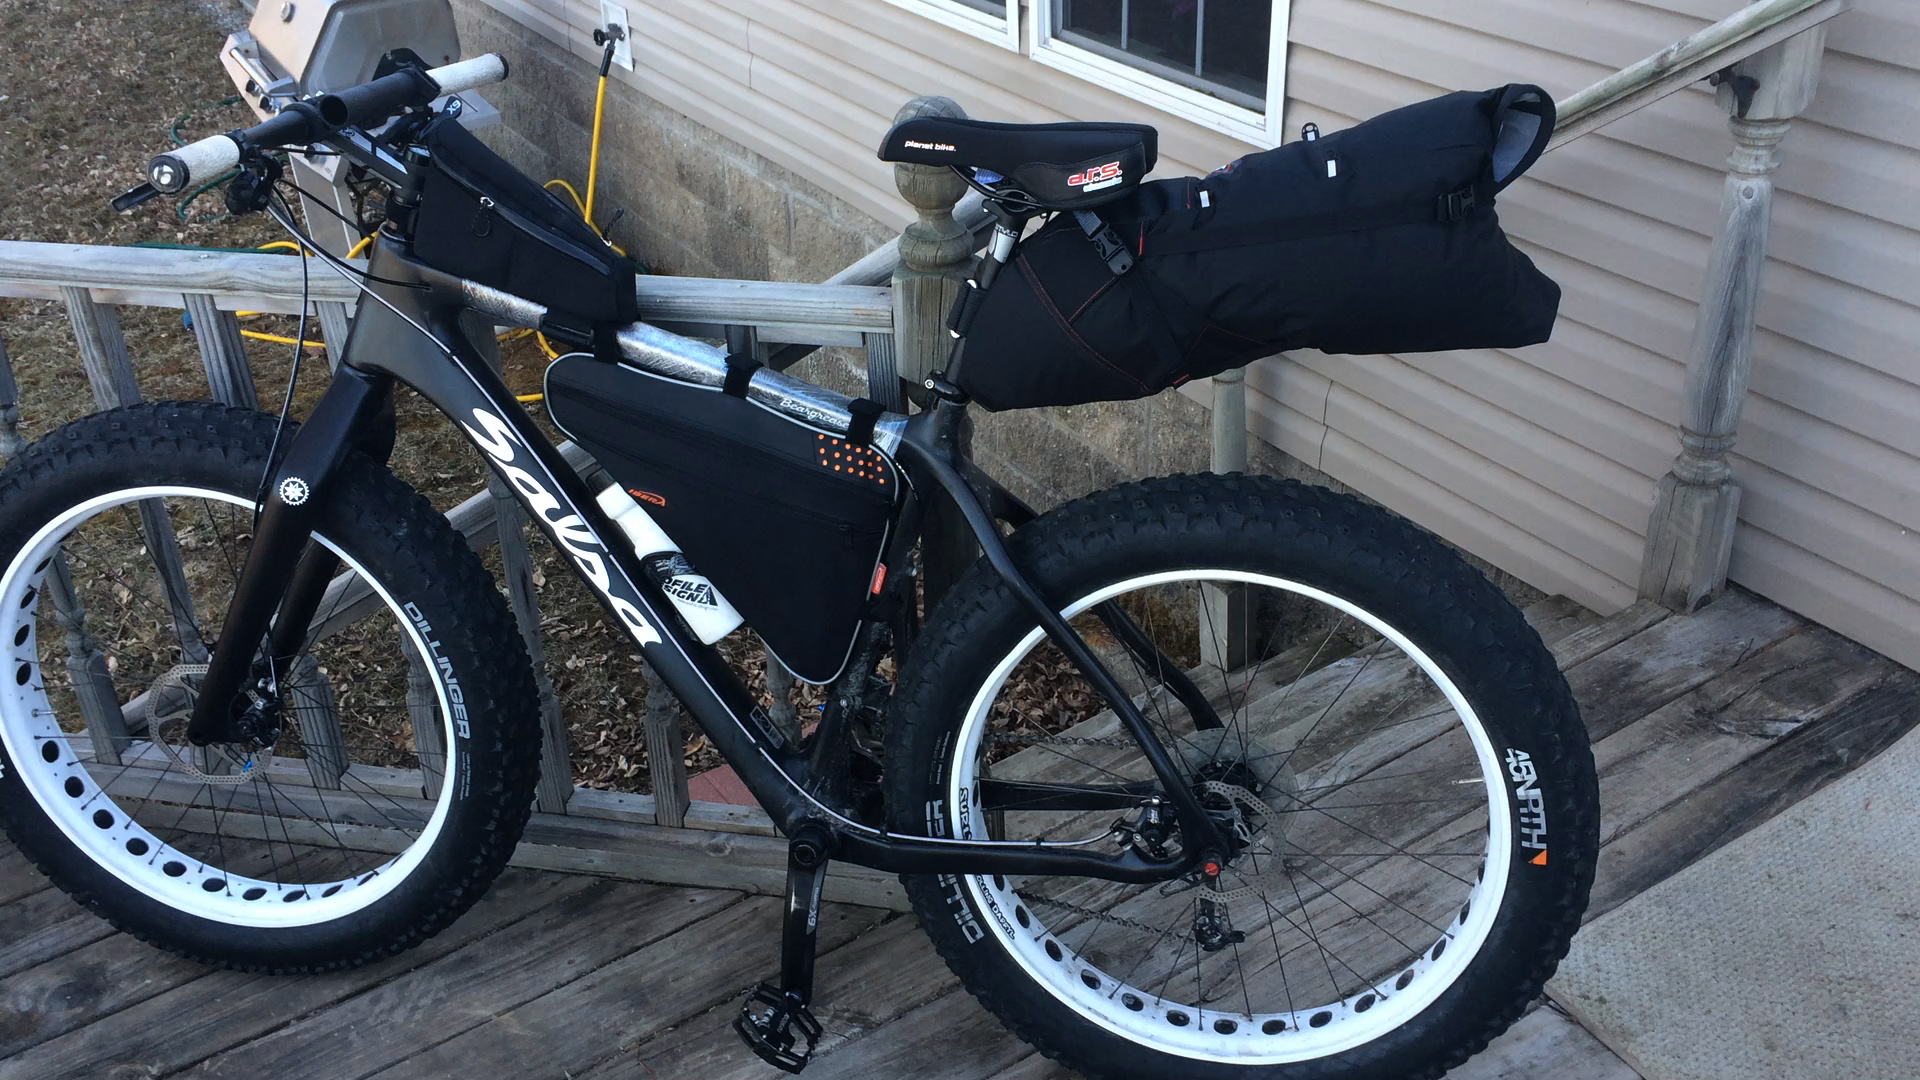
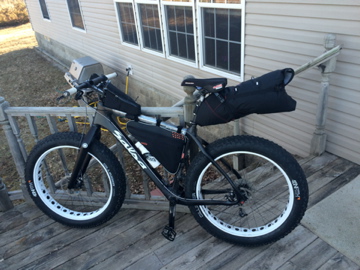
The next big problem is encountered when you try to attach the thing to your bike. I’d planned originally to get this setup on the Salsa Warbird with its drop bars. But it just looked too complicated to attempt so I decided to try it on the Salsa Beargrease first with its flat bars. This proved more than difficult enough for my feeble brain to handle.
OK, you have to get the thing in place somehow and obviously there are cables all over the points where the bag is going to sit. So you can dinker around and try to move aside the cables or have them trapped behind the bag. None of that was unexpected but still proved a real pain, nevertheless. But how do you attach the bag to the bike? Sure, the provided straps allow you to strap it to the bars, but its hanging down and swinging around in the breeze so it needs to be secured to the bike.
Now Revelate Designs have thought of this and they provide a single loop attachment point on the back of the bag, straps and foam pad to attach it to the headset. But wait a minute. The bars turn yet the headset is stationary in relation to the turning bars and thus the turning bag. Are we to believe the bag is anchored to both a moving part and a stationary part? And what of the area of the headset where the bag is attached, won’t that simply….wear out? Well I’m not going to subject a carbon frame to the obvious rubbing motions that this setup will create. Nor am I going to add turning resistance to the bars. Time for an email to the manufacturer to see if I’m going about it all wrong:
Hello Eric,
I’m trying to attach a sweetroll to a Salsa Beargrease Carbon, without much luck.
The single attachment point and strap, what part of the bike is that supposed to wrap around and attach to? It doesn’t fit on the exposed part of the fork tube on top of the spacers, as that’s way too high. Surely this isn’t intended to strap to the frame? I mean there’s no way I would tie that to a carbon frame when the thing is being constantly ‘wiped’ from the rotation of the handlebars??!
To which came the speedy reply:
Hi,
Try going lower around the lower headset race where the frame meets the fork.
Eric
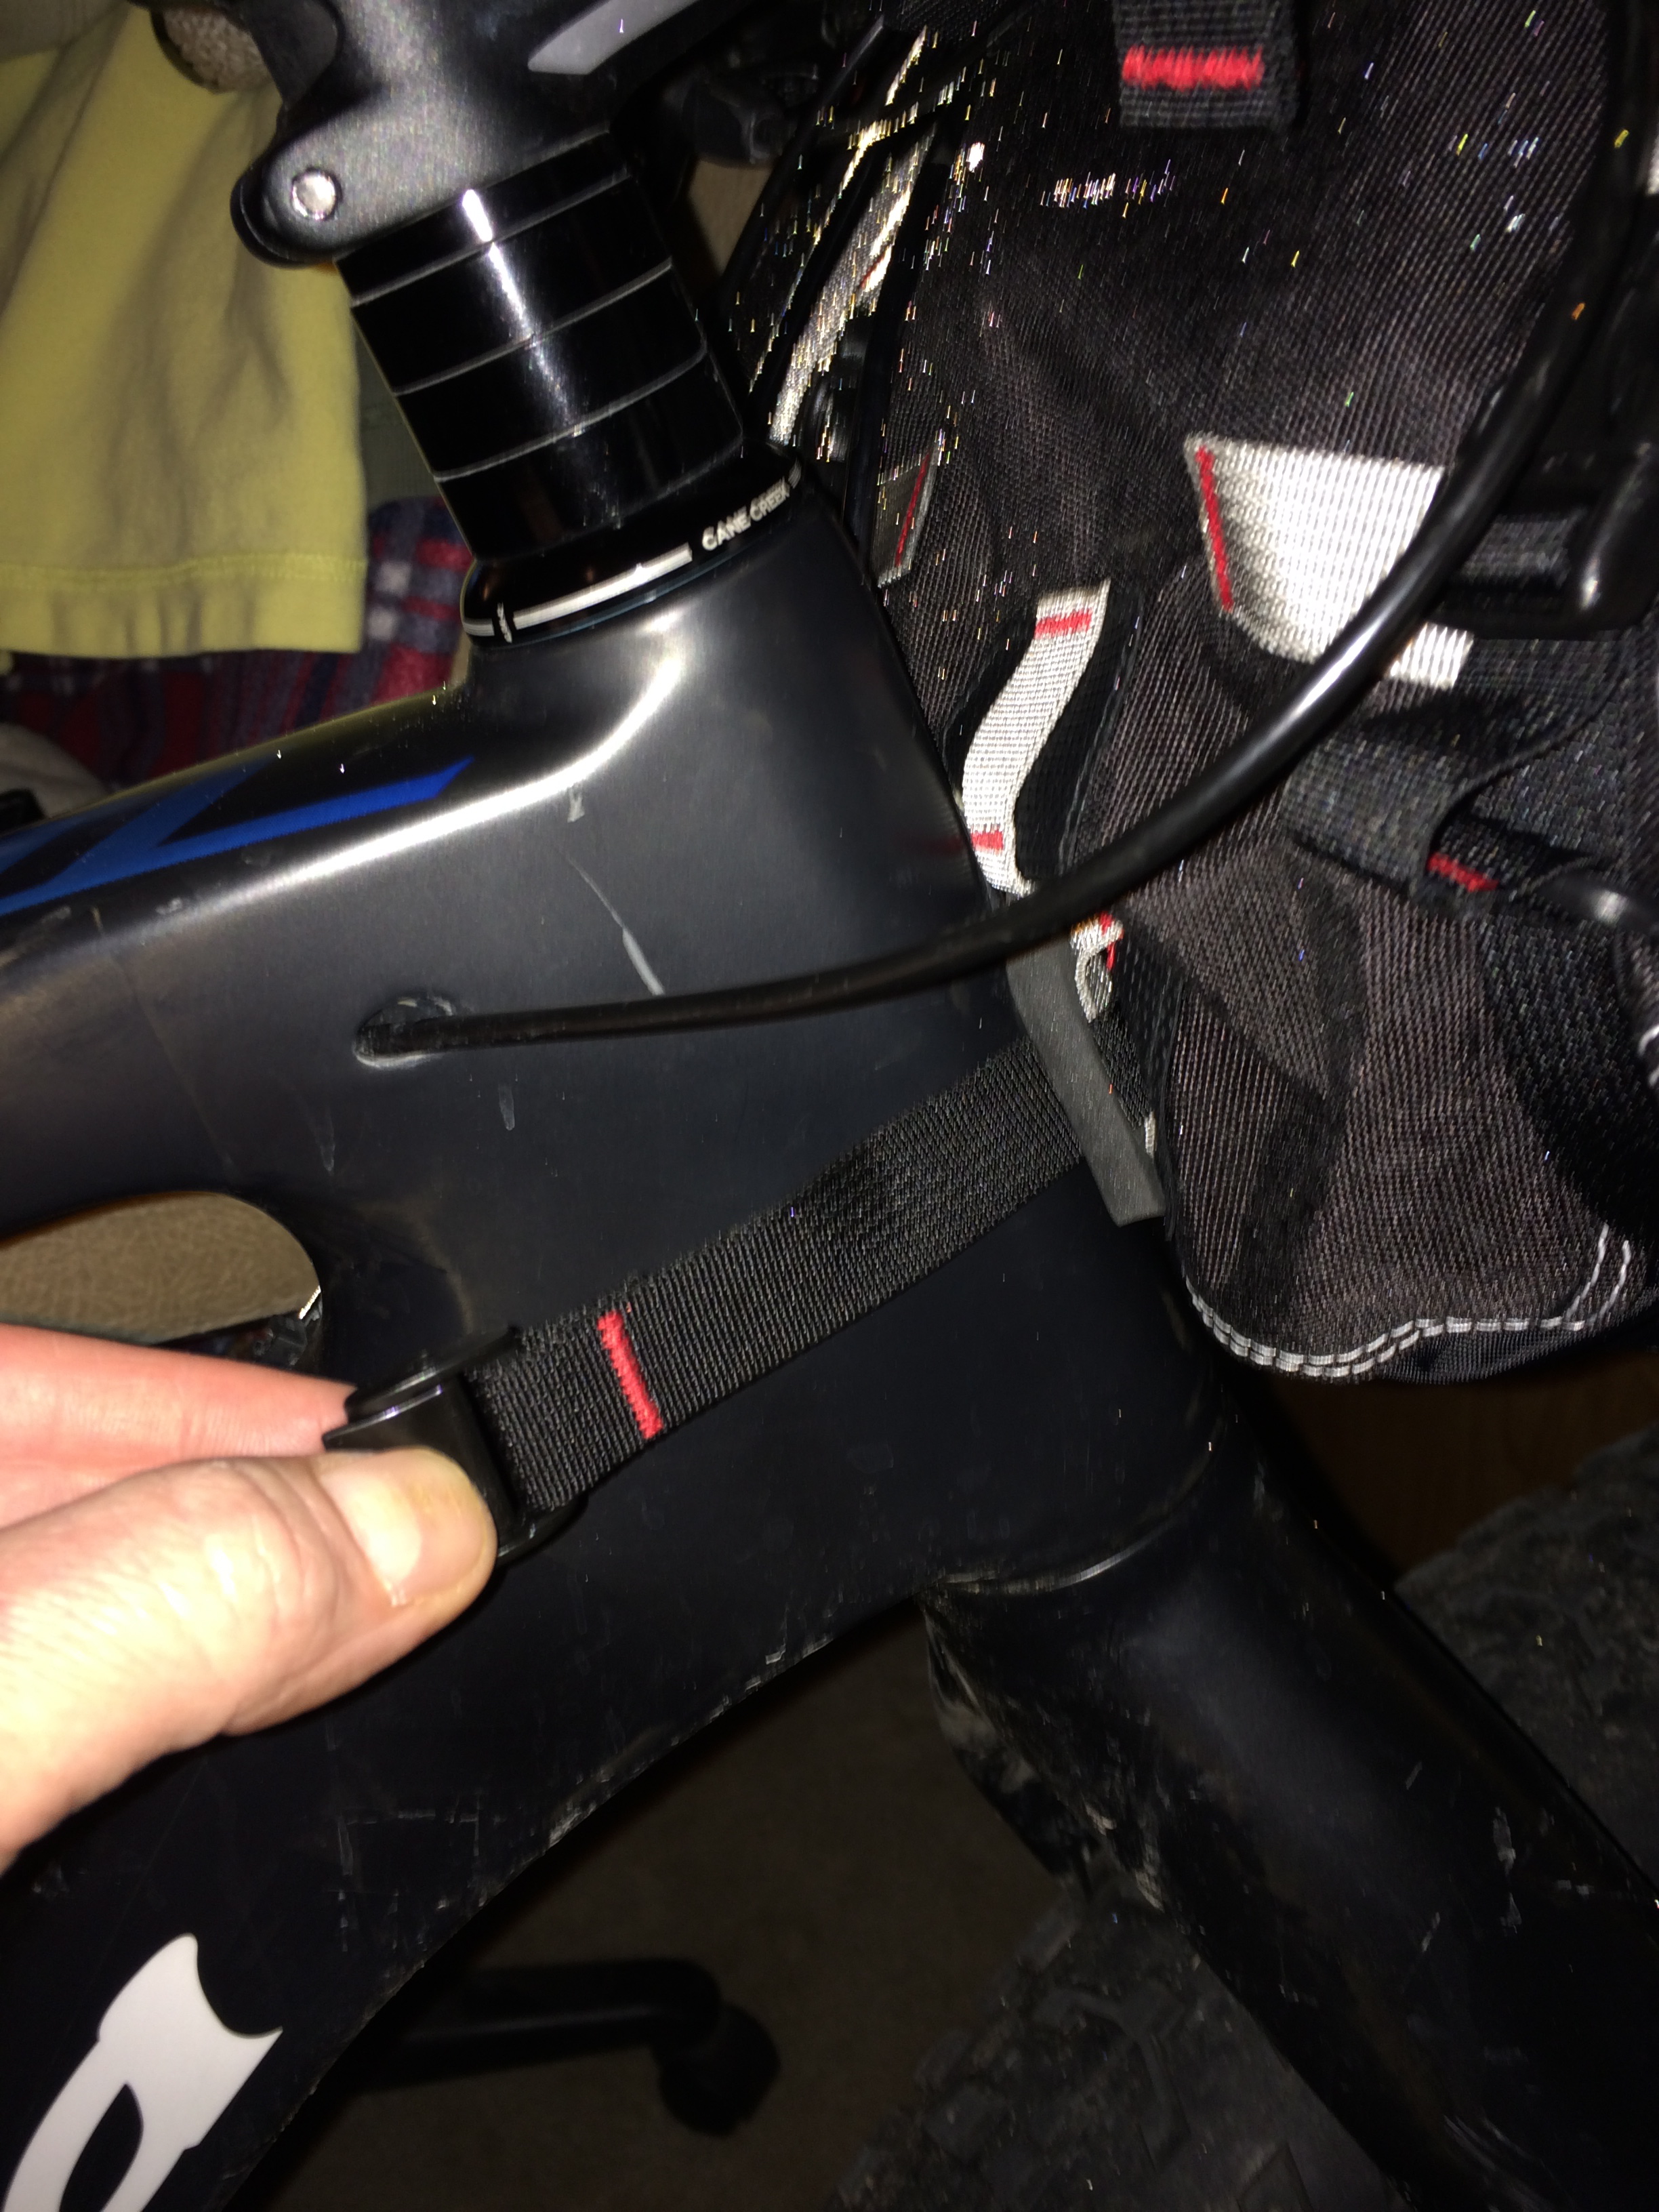
So indeed, my initial fears were confirmed. They expect you to attach the bag to the moving bars and to the fixed part of the frame. I sent Eric the photos so he could see what I was up against.
Oh Eric, I don’t think so.
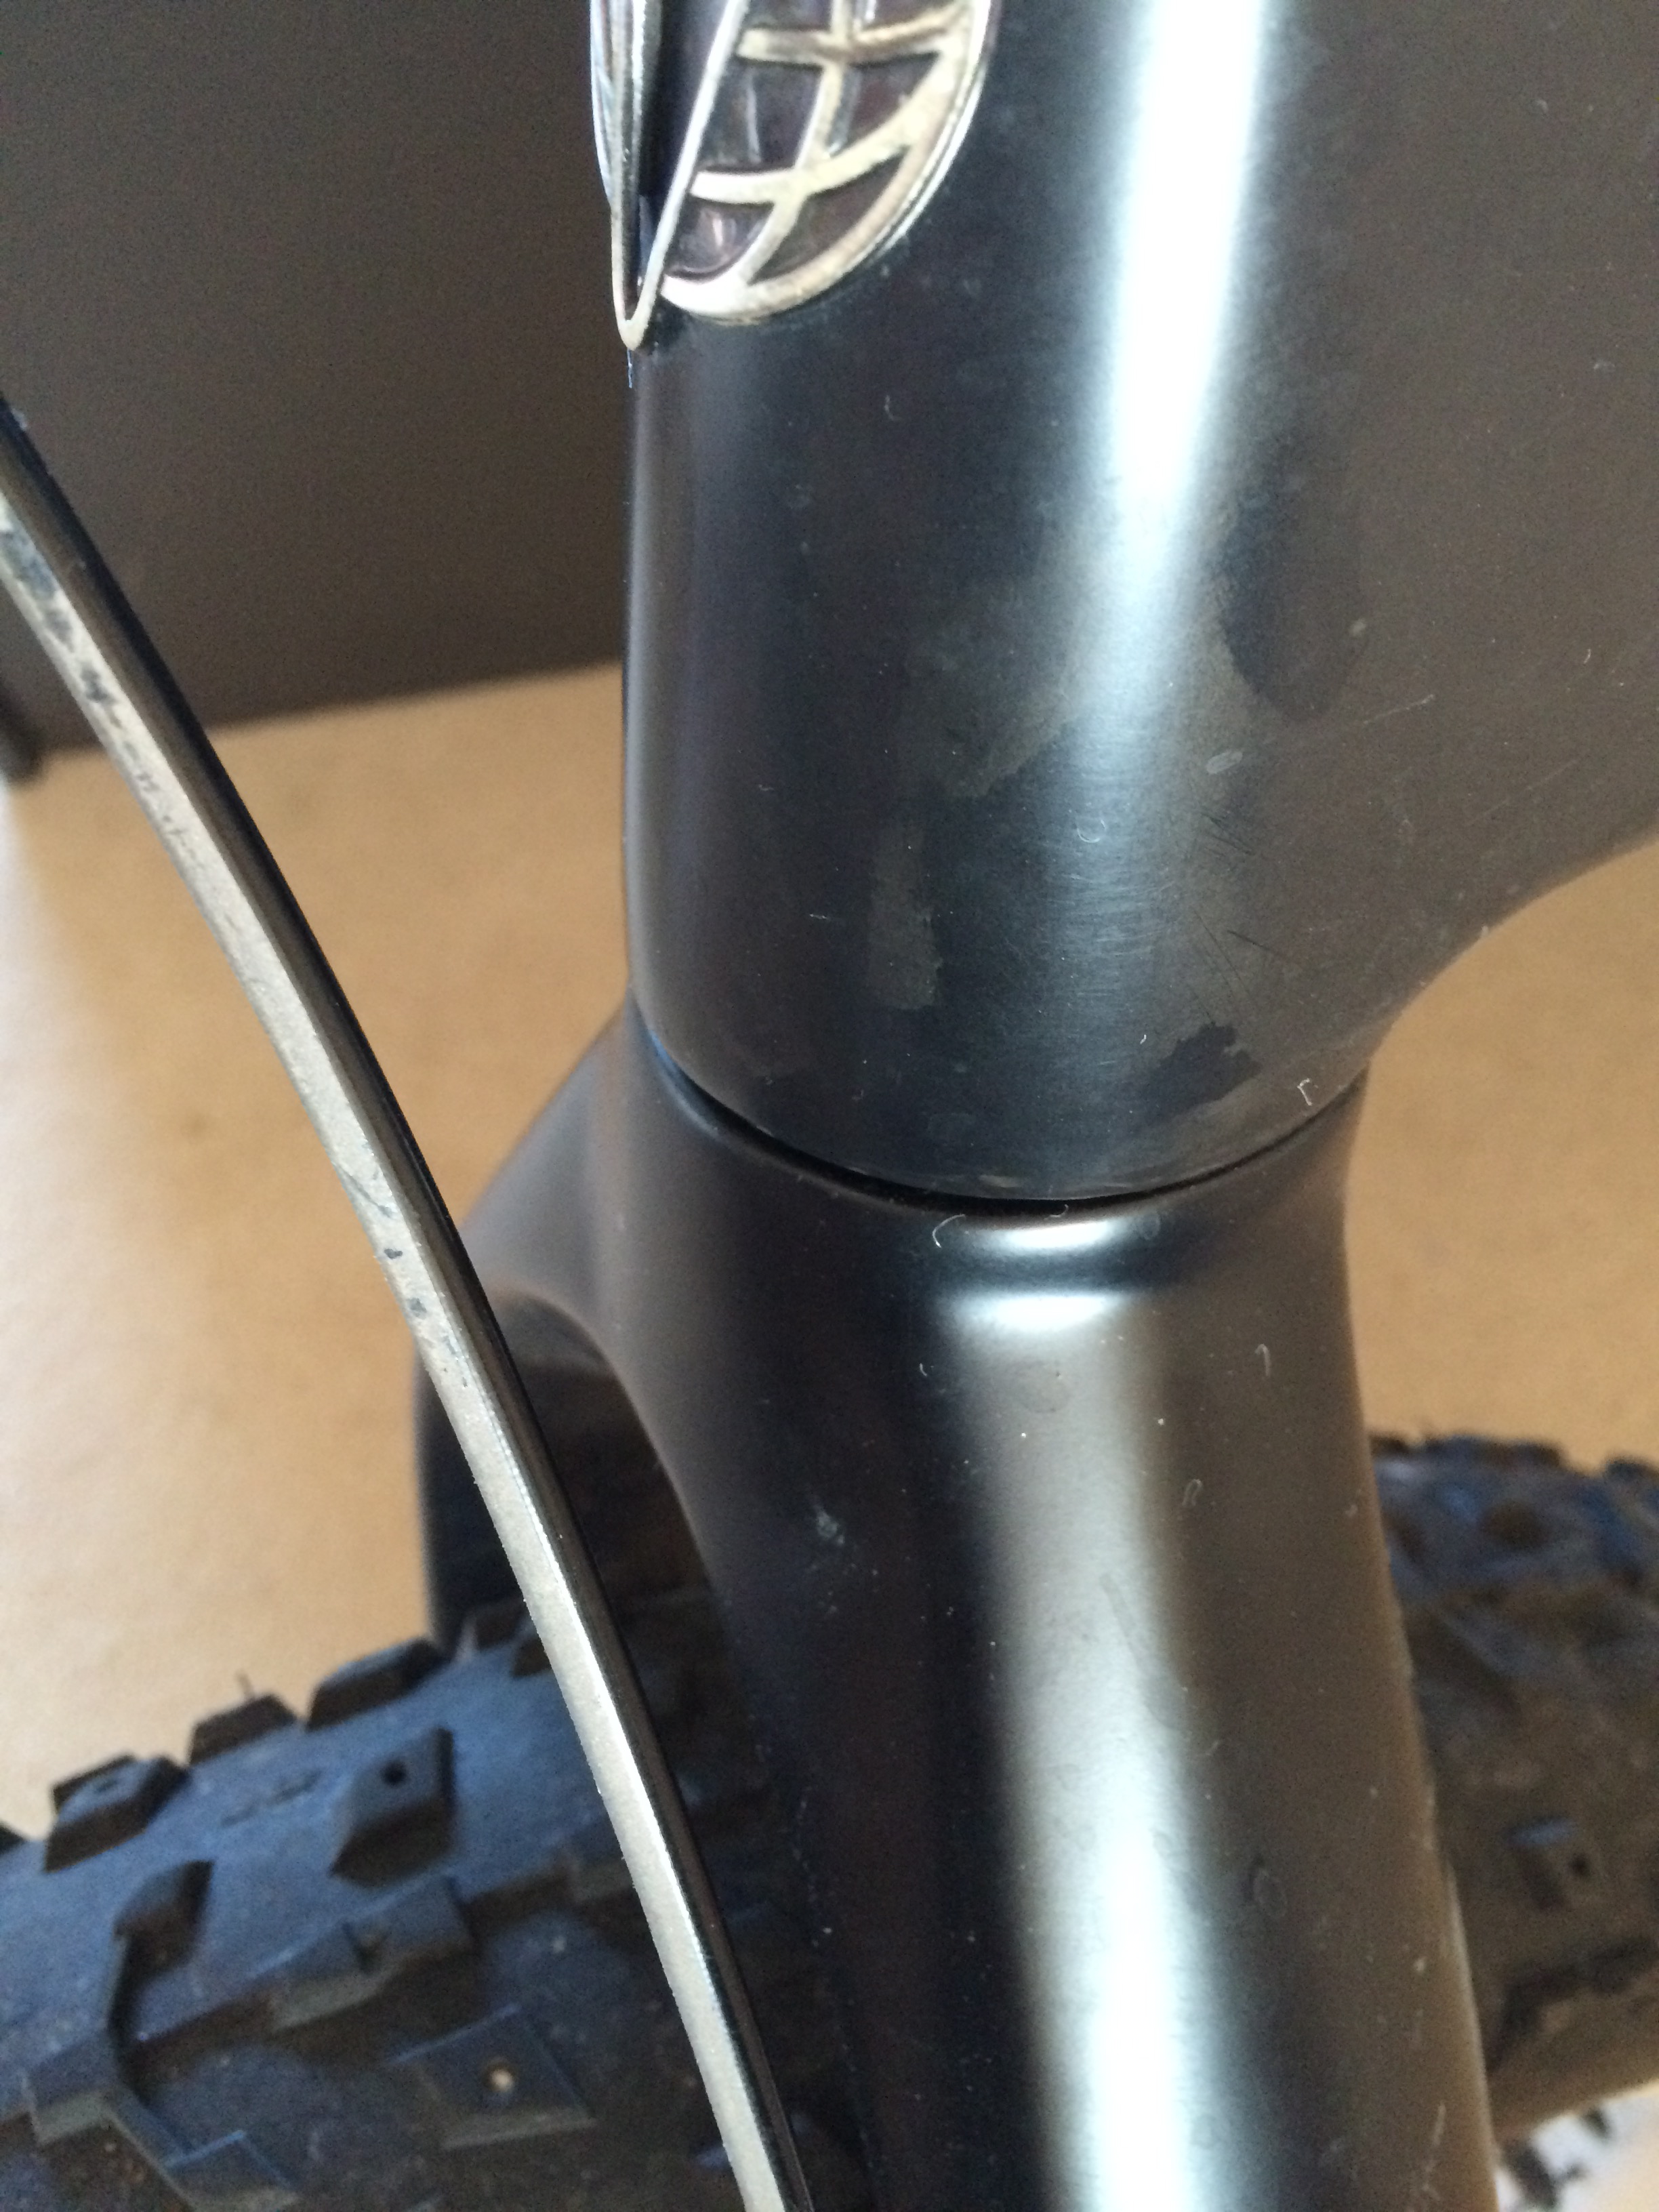
So this is where they expect you to secure the bag, above. You can see that I’ve marked the carbon headset just from attaching it and turning the bars once or twice. You can’t attach it any lower or higher, it doesn’t fit anywhere else except right on top of or just under the Salsa badge!
Let’s take another look below –
Above you can see clearly where they expect you to put the securing straps. These would be sliding side to side as you turn the handlebars. They’d wear through a carbon frame in no time at all, then the f’ing headset would fall off and where would we be?
We’d be here, that’s where. This is what I do when I get stressed. I go out and drink coffee and eat cake. Then I have to pedal an extra 100 miles to burn off the calories. Thanks Revelate Designs, thanks a lot.

Of course I could use some type of frame protector. But the straps aren’t long enough as it is and that wouldn’t resolve the issue of trying to turn handlebars which are locked to a stationary part of the bike via a bloody bag!…
As a clue to the fact that the designer hasn’t really given much thought to how this bag should be attached to the bike, Revelate Designs have made a handy little YouTube video showing the attachment process. Except that it doesn’t show you the part of the process that you need to see. They show you how to use the little spacer pads to attach it to the bars but they don’t attempt to show you how to attach it to the frame. Now we know why.
Further evidence needed? – Sure. Take a look at the images on their website and you’ll see the Sweetroll bag hanging from a set of handlebars which are hovering in space. No bike or frame anywhere to be seen, so no advanced clues (ahead of purchase) indicating what a rat bastard procedure this is going to be.
So what are my options?
1 – Do as they recommend then expect the front end of the bike to drop off after sufficient time has elapsed for the bag attachment to wear its way through the carbon headset. (Fine if you don’t intend to go round any corners).
2 – Let the bag dangle freely from the bars, swaying in the breeze. (Fine if you don’t intend to go round any corners).
3 – Something else?
So I set about coming up with another anchor point for the bag, one that wouldn’t be attached directly to the frame. So I came up with a rather ingenious system based on triangulation and simple levers/attachment points.
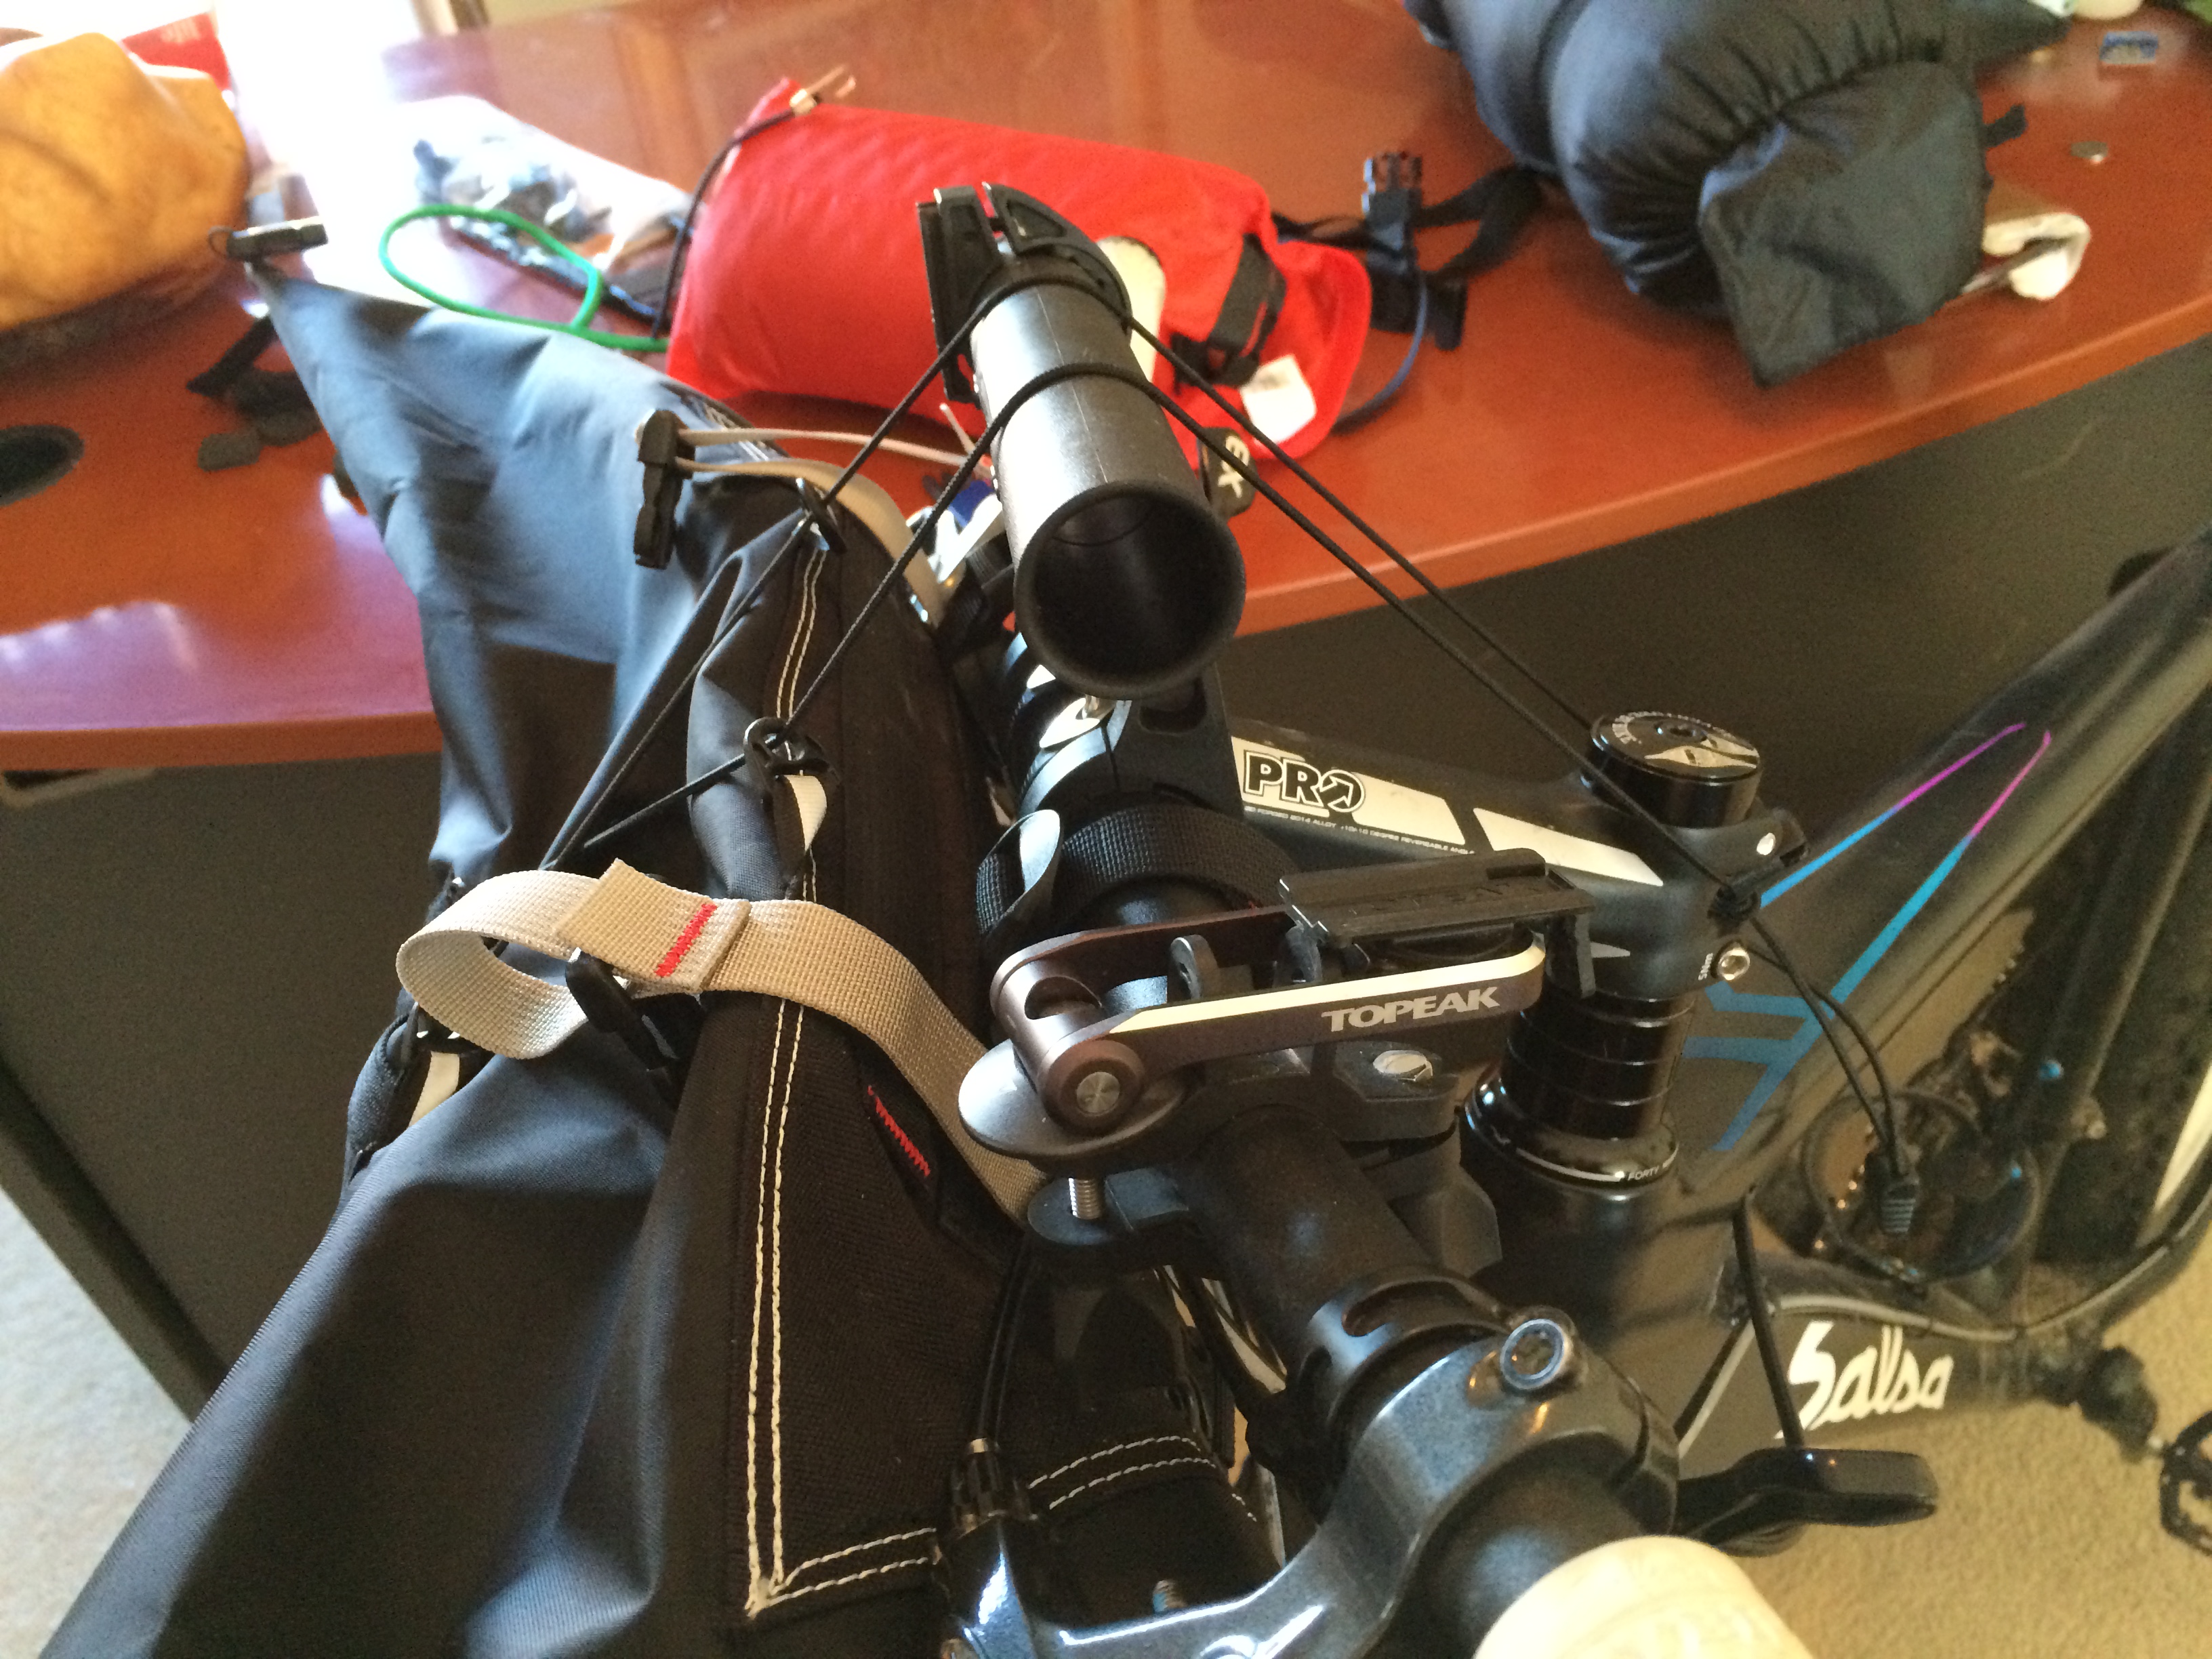
Using a cheap plastic bar extender, I mounted it pointing upwards and used that as the fulcrum on which to secure the ties. It now looks like this –
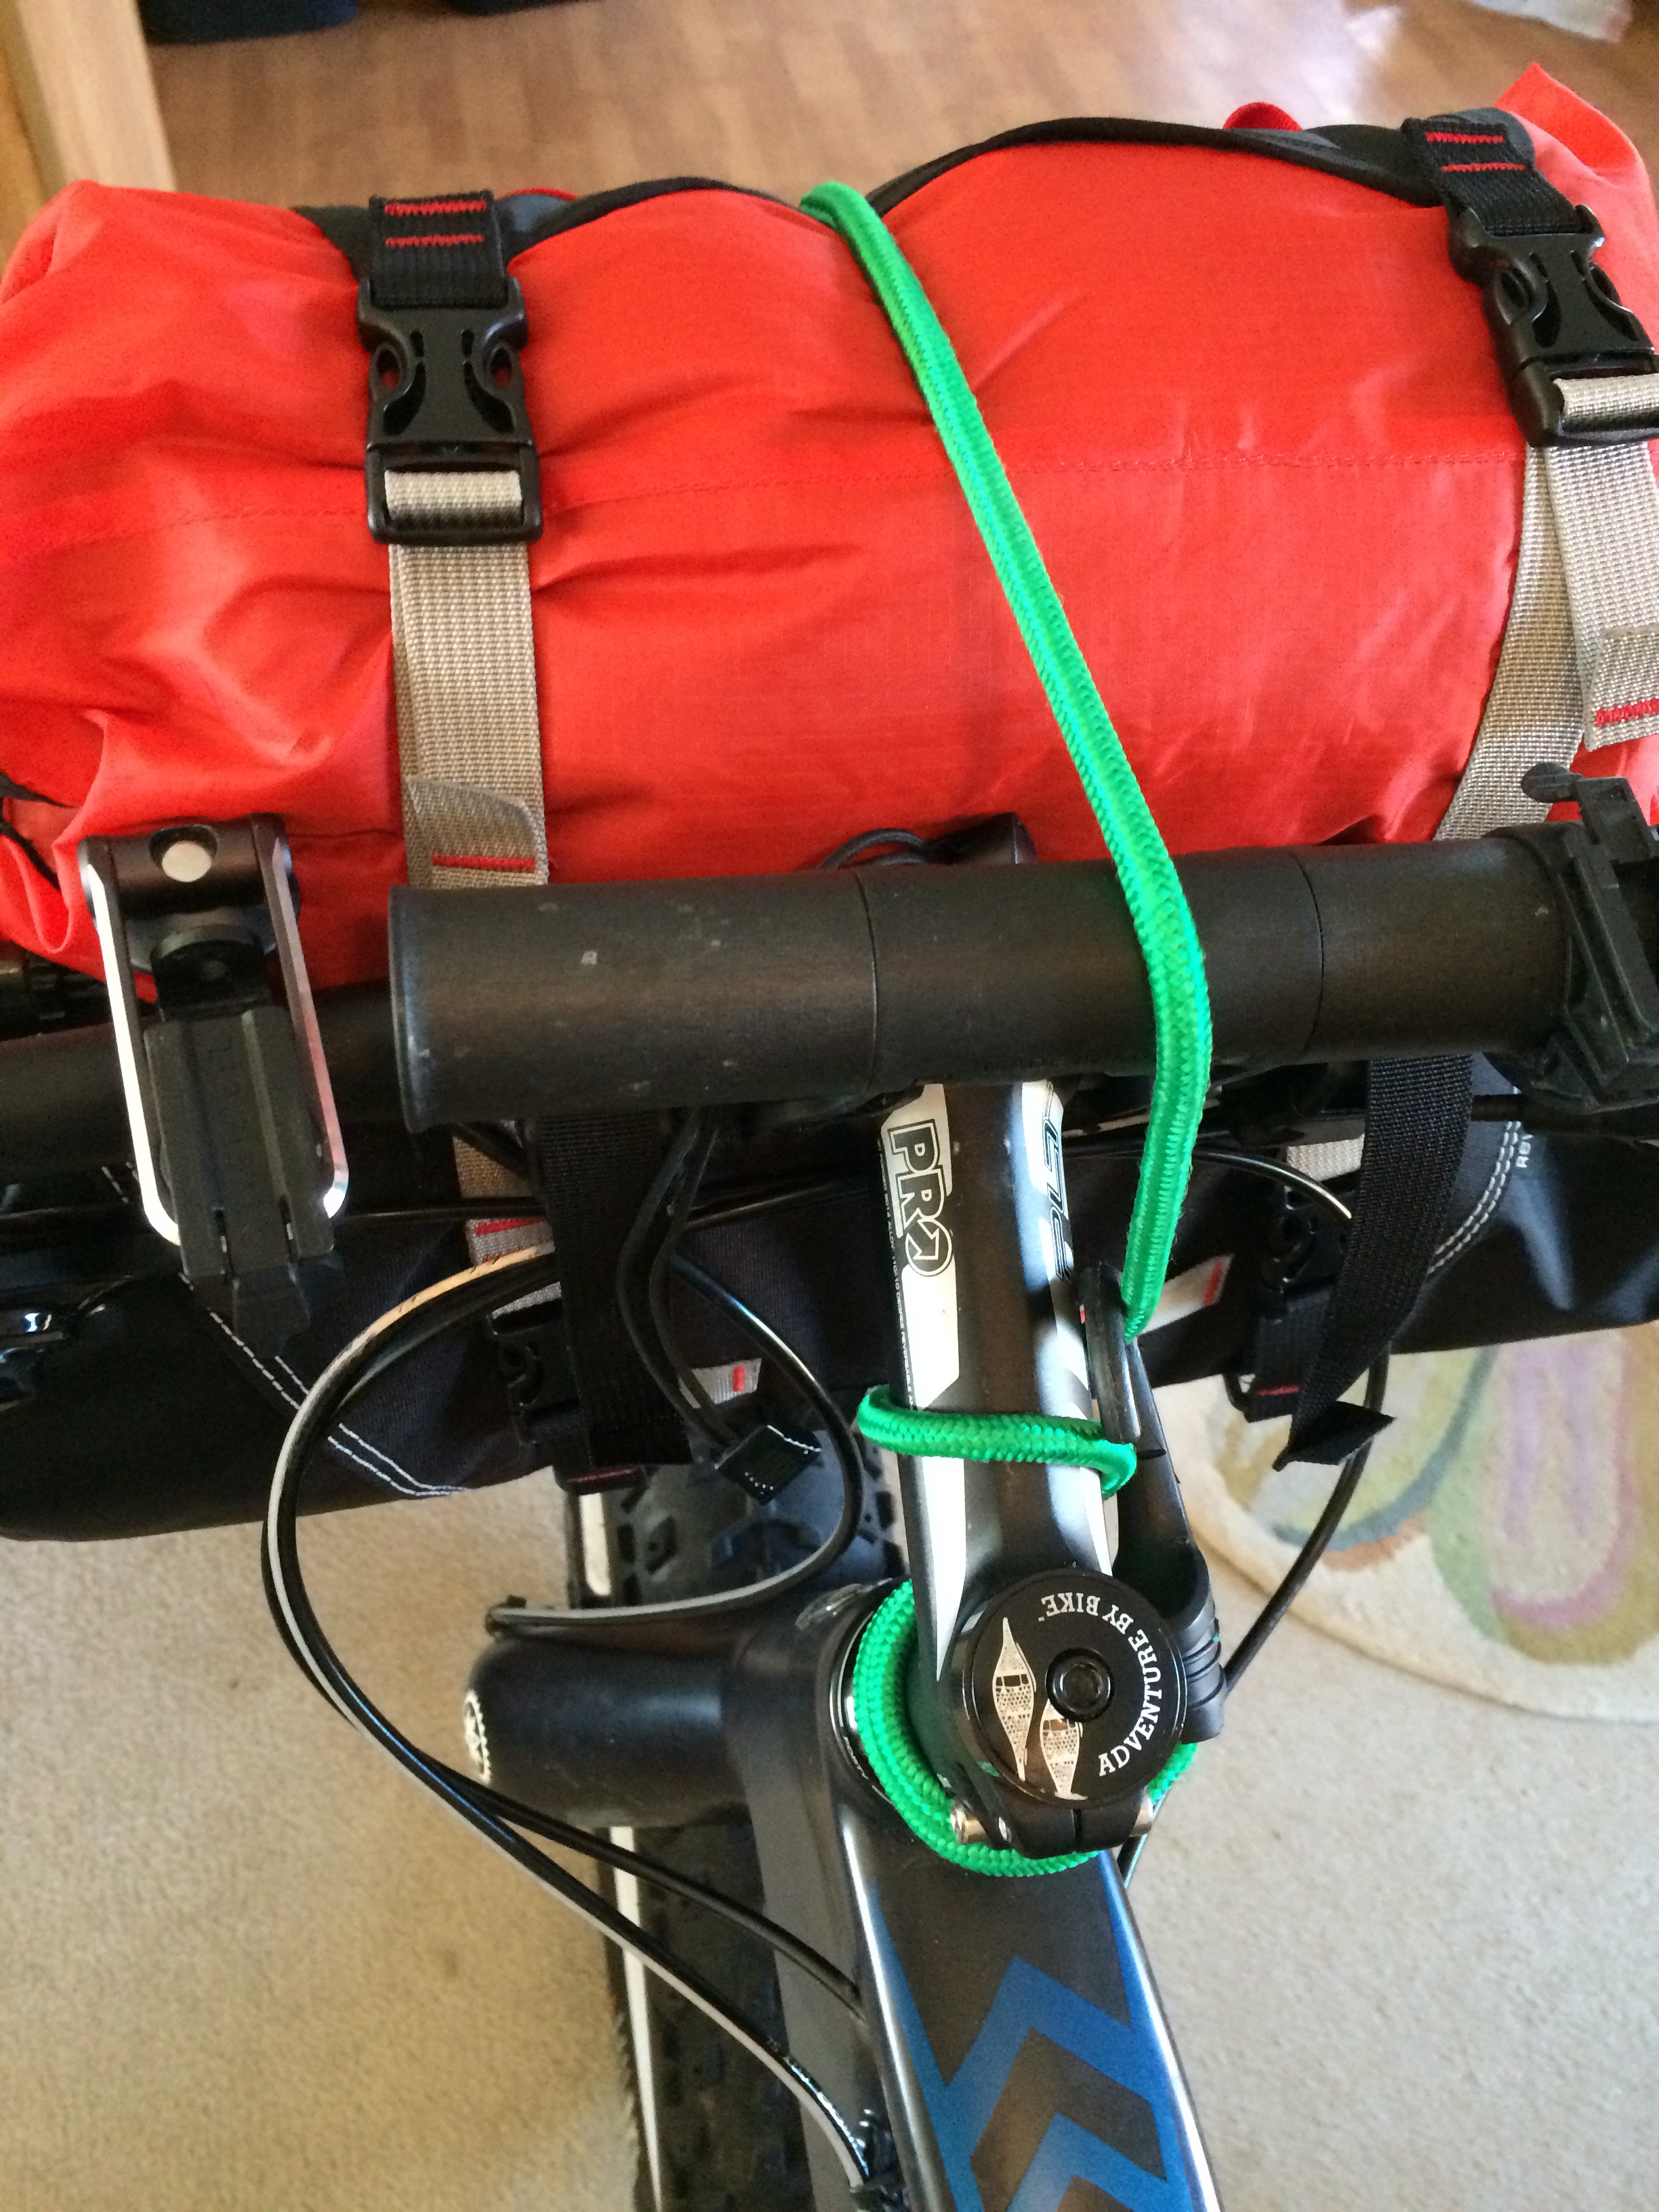
Above you can see the bungee wrapped around the stem, then it goes up in the air and over the top of the plastic bar extender, then under the Sweetroll and back onto the bars. It basically secures the whole deal more effectively and stops it swinging around.
The bungee also helps lock the contents in place and stops them sliding around inside the bag. Here’s another view, this time I tried using the cords belonging to the harness instead of the bungee. It didn’t work so well but it gives you a better shot of how they’re lashed over the top of the bar extender.
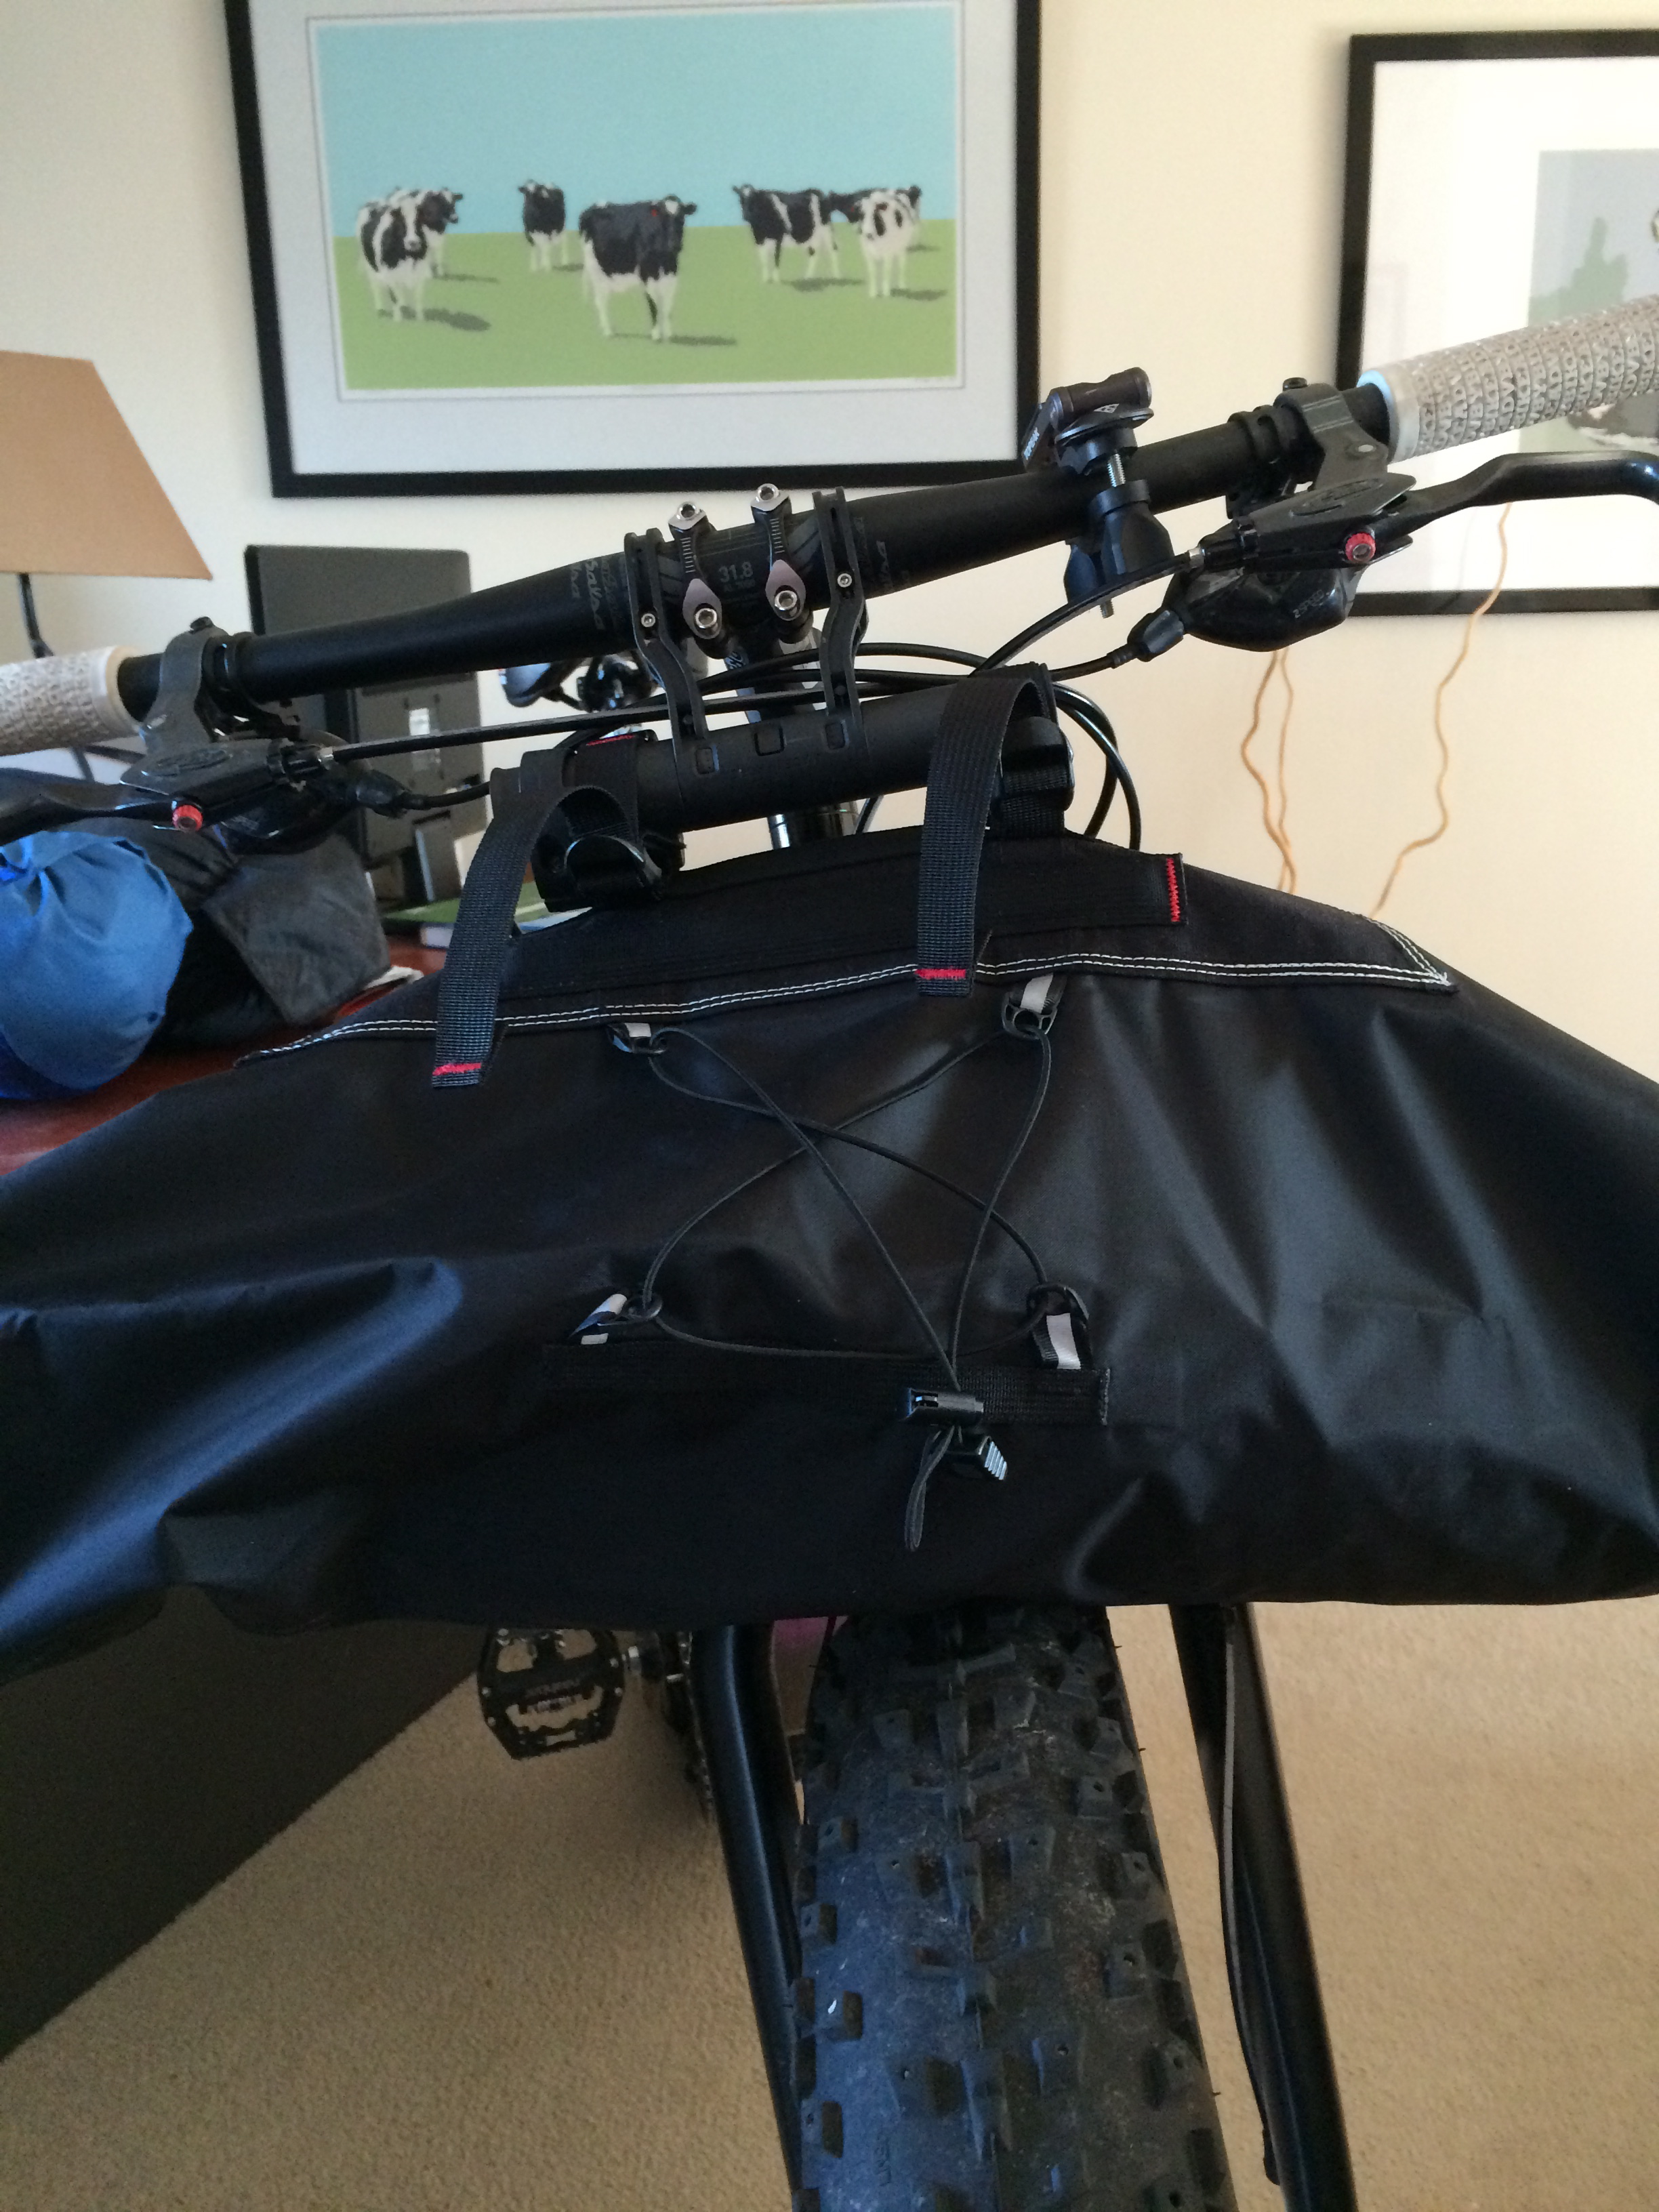
It’s basically working like a set of trouser braces, keeping the bag hoisted up so they ain’t hanging low and giving you a plumber’s arse.
What a bloody rat’s nest of epic proportions. ^
Incidentally, I did try lashing the sweetroll to the bar extender when it’s in its intended outwards position, but the clamps on the extender cannot be tightened sufficiently to stop the extender from swinging down on the bar tubes.

Confused yet? I was.
Now just don’t expect to take the bag off the bike when you get to camp. In fact, you really can’t expect to do that even if you adopt the Revelate Designs mounting system with its foam pad et al. It’s just too messy trying to get it all reattached when you break camp in the morning.
There really needs to be some method of quickly attaching this thing and allowing you to quickly un attach it. You can’t be putzing around for 20 minutes when you need to get on the road. Nor can you leave it on the bike sitting out in the rain overnight.
There needs to be some 3rd party bracket that makes this thing more viable.
I have in fact seen an aluminum extension bracket that might work, but the thing was close to $200.
So for now, it is what it is. I’m disappointed in how it works, or how it doesn’t work. So much so that I took to the forums asking for others to chime in, and it seems people are just putting up with it. Cattle. ‘The Bewildered Herd’ as Noam Chomsky likes to call them. Speaking of which, how do you like my limited ed Giclee of Wisconsin Dairy Cows? It’s yours for $2000 or I’ll trade you for bikes/parts.
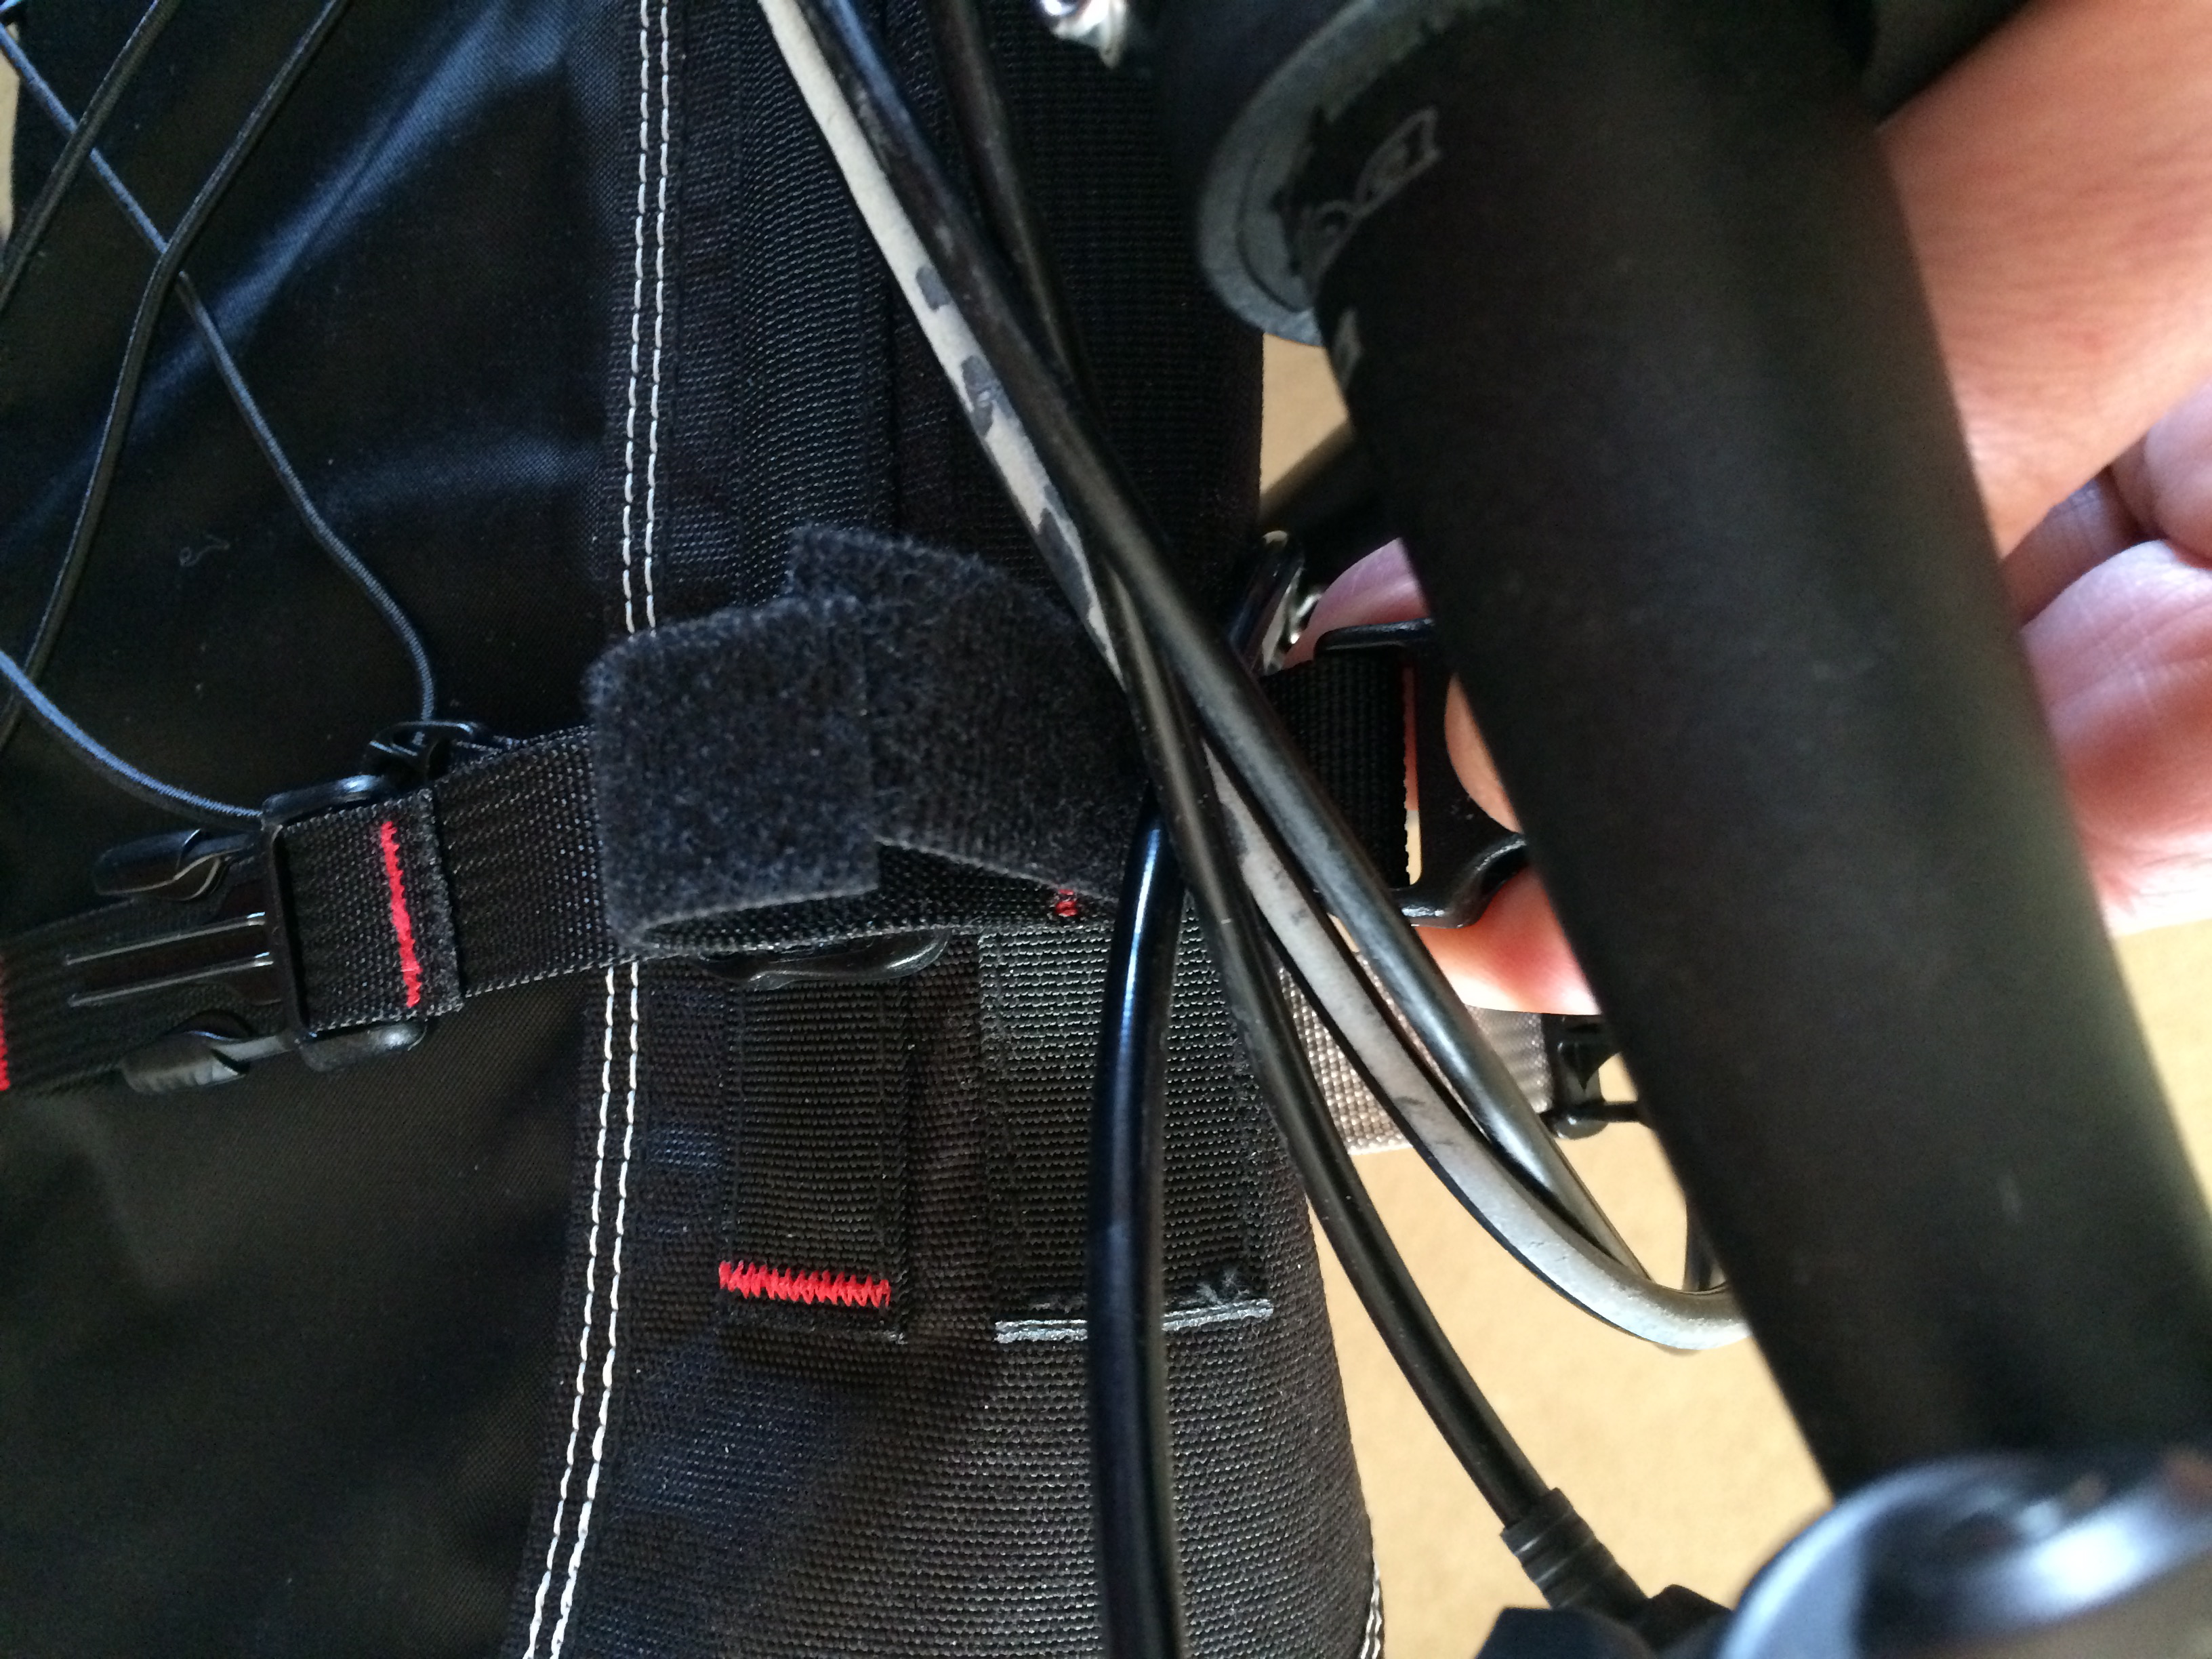
Routing cables to make way for the Sweetroll (above). I really don’t want to let the Sweetroll just swing around whilst it’s leaning against the cables, it’s an accident waiting to happen, IMHO.
Again, don’t expect to mount this bag satisfactorily in a hurry when you break camp, it’s an immense pain in the rear.
Bag Capacity –
On a more positive note, the bag holds ample gear within and the external harness option is a nice touch. Using the full 22″ length I can get my rather large 2-man tent inside the Sweetroll and pack a couple pair of socks and undies on the ends before sealing it up. My inflatable ground pad fits inside the harness and my bulky coleman bag can be lashed to the front of the Sweetroll. So all of the heavy and bulky items can go on the front of the bike, around 10 pounds total.
Revelate Designs Viscacha Seatpost Bag
So this is a much more straightforward beast. It’s a large bag that mounts under the seat and secures to the seat rails and to the seat post.
Again, much like the Sweetroll the Viscacha looks incredibly well built, and thought-out….until you try to attach it to the bike.
This time there are no cables to contend with nor any other real obstructions. But just try and thread the attachment straps though the seat bars/rails, with the Viscacha full of gear. It isn’t possible. I struggled with it for 20 minutes then gave up and emptied out the contents of the bag. Even empty, it isn’t easy to thread those reinforced straps through the seat rails, they’re too thick and too short.
Also, I want to decouple this from the bike when I get to my destination without having to empty it out! I pack it with the stuff I need last placed into the bag first. So if I’m going on a 3 day trip, I don’t need the stuff in the front of the bag until day 3. But with the attachment system, I have to empty out the bag and repack it each day, otherwise I can’t get it back on the f’ing bike!.
Is it just me?
The bag should be made so that the attachment clips independently under the seat and stays there. Then you just clip the bag to the attachment and tighten it up. What could be easier? Threading the straps through the seat rails is impossible when the bag is full – surely the designers have actually tried to use this in a practical application?
Is it just me?
Well maybe it is. Everyone else seems to rave about the Revelate gear. I’m the only one kicking up a fuss it seems. But hey, I paid $120 for this thing, it should work better than it does.
Bag Capacity –
I was able to cram plenty of clothing and light accessories inside the Viscacha, it’s a little like Tardis in that respect. Using a triangle bag and the Sweetroll bag, perhaps along with a lightly loaded backpack, there’s enough space for a max three day bikepacking adventure involving the use of a tent. Any longer than three days and I’d probably switch to the Ortlieb pannier system. For CC touring the set works fine and one could probably pack comfortably for a full week.
Revelate Designs Gas Tank Bag
The Gas Tank bag is a cheap looking affair and doesn’t deserve to have the RD name/badge printed on it, in my honest opinion. Sure, it does what it says it does, it sits on the top tube attached with a pair of velcro straps, and allows the storage of keys and a few spare quarters for the vending machine. But for $55.00…really? It looks like a $15 bag, which is what it is. And there are plenty of cheap bags around that do exactly what this thing does, so the only reason you’d buy this particular one is A – you hadn’t seen it in the flesh (as with me) or B – you want a matching set of RD bags and don’t mind paying over the odds.
So despite my attachment anxiety with the Sweetroll and Viscacha, I do see value for money in those products, but the Gas Tank bag is just plain over-priced.
 Picture above shows the IBERA, the GasTank and a small Topeak saddle mount bag, not the Visacha.
I could also have gone with Revelate Designs for the frame triangle bag, but then I came across the IBERA Triangle Frame Pack.
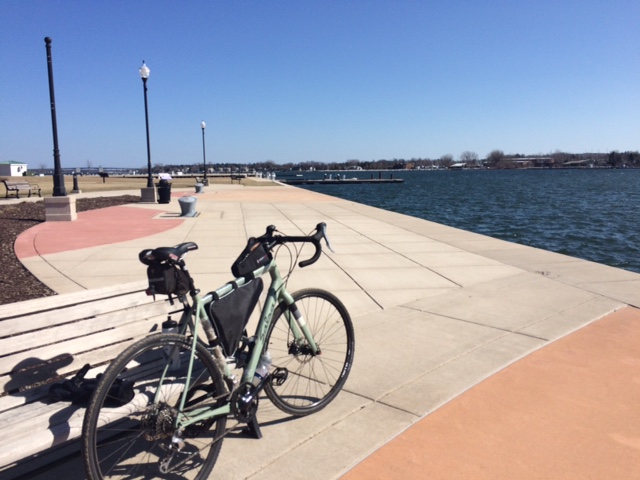
I bought the Ibera for only $16.99 and you can see it above on the Warbird. It works great, has a strong zipper, plenty of storage, and there’s even enough room to squeeze one water bottle in a cage. The Revelate Designs version for a Salsa bike is around $140 and doesn’t appear to offer much additional capacity or any added features. So hit up Amazon and save your money. (Just my personal opinion).
So look, I really like the way the Revelate Designs stuff is built (with the exception of the Gas Tank), and the fact that the Viscacha and Sweetroll have good capacity and appear durable, just don’t expect an easy time of hanging the stuff from your bike.
 Now all of this above is particular to a Salsa Beargrease Carbon. Looking at the Salsa Warbird, I don’t see it being any less difficult a task to attach the bags. In fact, I think it’s going to be far tougher at the front end (with the drops) and just the same at the back end (I have the same ‘Planet Bike’ saddle on both bikes).
Now of course all of these niggles are resolvable, and it isn’t Apollo 13 stuff either. I’d just sooner have the designer come up with some viable solutions rather than drop it all on me, the unsuspecting buyer. And I’m aware of the fact that bikes come in a variety of shapes and sizes and that there isn’t always a one-size-fits-all solution, but at least give us a clue upfront as to the various issues one might encounter when using this kit; perhaps a detailed FAQ, or even a hosted user-forum where feedback can be shared.
Sorry, but that’s the way I sees it.
FMB
May 2015
For tips on protecting your frame from the effects of frame bags, click here
***UPDATE JUNE 9 2015***
I wrote the above review about a month ago and it was based mostly on a ‘dry’ setup, that is I mounted the bags on the bike but hadn’t at that point actually used the gear in anger.
Since that review I’ve been out on a few trips, some using the Beargrease and some with the Salsa Warbird gravel bike. The Warbird is reviewed here and you can read a ride report here.
So now that I’ve spent more time with the Revelate Designs gear, has my opinion changed? Well it has, a little. First off, mounting the Sweetroll is much easier on the Warbird than with the Beargrease. This surprised me a lot since the Warbird has drops and the BG flats. But with the drops the bag mounted up easily over the top of the cables and the foam spacers worked well in setting the bag at the proper height. I was even able to clip the bag on/off the bars without too much fuss, so packing up the front end at the campsite wasn’t too big a deal.
Also, I packed my tent and poles in the Sweetroll but I packed them separately. So the tent went in first. I centered the tent bag inside the Sweetroll then slid on the poles so they were also centered and in the lower-front of the bag to avoid the shifters. It sat nicely without obstructing the levers at all. I then used the front Manta Flap for the ground pad and hooked my bag onto the setup using bunjees.
Here’s a couple pics of the front end:
The Viscacha was no less frustrating on the Warbird than it had been on the Beargrease. I still maintain that the attachment method where the straps pass over the seat rails is poorly thought out and executed and it makes getting a full bag on the bike extremely awkward.
I’m pleased however with the capacity of the Viscacha, it holds a lot of stuff. It would be nice to have access from the top or bottom of the bag via a zipper, to prevent having to empty the whole thing out to get at the contents.
So I suppose I’ve warmed up a little to the Revelate Designs bags, with the reservations as noted above. I would say that any inadequacies are 70% ‘nature of the beast’ and 30% lack of consideration to practical application. Which isn’t too bad overall, I suppose.


Have you ever tried or thought of a BOB Yak or Ibex trailer? Seems like that would be the way to carry the most shhhtuff and affect bike handling (and cable routing and rub wear) the least.
Funnily enough I believe a trailer was mentioned somewhere around here a while back. I gave it some fleeting thought then dismissed the idea on the basis of thinking that it would negatively impact handling. Since then I’ve seen a few out on the trails and they look pretty cool!
I need to find one to try out…thanks for reminding me about this!