

I haven’t had any prior with tubeless setups, before buying the Salsa Beargrease. I’ve done a lot of reading up about tubeless conversion and seriously considered converting my tire setup on the old Charge Cooker Maxi 2 (shown above, with On-One Floaters) to tubeless, but with that bike being almost 40 pounds to begin with, I didn’t think shaving off a few ounces from each wheel was going to make any difference.
That’s because I have learning difficulties and I don’t listen.
Tubeless, according to the many things I’ve read about it, involves more benefits than simply a reduction in rotating mass. But I wrongly assumed that the other benefits were rather far down the list, and that weight savings is what it’s all about.
So the Salsa came tubeless, with Dillinger 4 studdable tires, 120tpi. The first impression I had of the Beargrease was that it provided a much smoother and more supple ride experience than the Charge Cooker bike. I immediately attributed the improvement to the Carbon frame, though in fairness to myself I did give mention to the improved wheel build and the tubeless setup, here in my Beargrease review.
For those who don’t know, tubeless means just that. Running a wheel without an inner-tube. It isn’t always the case that a rim, or tire, or specific rim/tire combination, will lend itself to going tubeless. My Dillinger 4 and Surly Rolling Daryl rims are both tubeless compatible.
Again, for the less initiated, the basic setup procedure for a tubeless tire conversion is this:
- Fill any holes in the rim by adding rim tape. Most fat tire rims are drilled through, to shed weight, so the rim tape needs to be quite beefy. Many people use Gorilla tape of a specific width as it’s cheaper than the custom made stuff you can buy from bike shops.
- Depending on the inside diameter of the tire bead, the rim may need to be built up a little with tape to provide a good seal.
- Install a valve with a removable core, and remove the core.
- Fit the tire on the rim and work the edges so they sit against the rim walls in position.
- Use a shop compressor to blast air into the tire. With the valve core removed the tire will accept a high volume of air rapidly, and this will force the tire into position on the rim and snug against the rim walls.
- Pour a 2 ounce bottle of Stan’s Tire Sealant into the tire through the valve. You can also pour the sealant into the tire whilst only one side of the tire is on the rim, but you risk making a mess.
- Insert the valve core and tighten.
- Inflate the tire to its rated PSI
- Rotate the tire for a few minutes so the Stan’s sealant can work into all the nooks and crannies.
- Re-inflate the tire then take the bike out for a ride.
- Re-inflate if necessary
- Check the pressure before each ride for a few days. Usually you’re good to go after the first top-up.
It’s really quite straightforward. Some people who don’t have access to a shop compressor try to inflate with a regular floor pump and they tend to have difficulty getting the tire on the rim and getting a good seal. Otherwise it’s usually a job which can be completed at home in 30 minutes or so, per wheel.
Here’s a vid I found on Yoot.
My First Flat
It wasn’t really a flat, I noticed that the front would lose pressure on the trail after an hour or two riding. When running at higher psi it wasn’t so noticeable, but when running in snow at 2-3 psi, I’d start to bottom out and hit the rim mid-way through a ride.
When this first happened, I figured I’d ‘burped’ the tire. Burping is where you corner hard or have a washout and you open a gap momentarily between the rim and the tire bead. The air drops out from the tire but you can re-inflate it without a problem.
But re-inflating started to be a regular occurrence so I came to the conclusion that something other than burping was afoot.
Inspecting the tire I quickly found the culprit. There was a stick, or thorn, or some kind of quill that had punctured the tire but remained in situ. Clearly the thing was causing the leak.
What to do?
My default position in these situations is to do nothing. I just re-inflated the tire before each ride and ran the front a little higher to compensate.
But I’m planning a possible road-trip this week so over the weekend gone I decided it was time to fix it.
I wasn’t sure how much sealant had been used on the install so I went out and picked up two 2 ounce bottles of Stan’s from my LBS. ($3.20 each)
I then pulled the thorn with a pair of pliers.
This is what came out – (not the glasses, just the thorn)
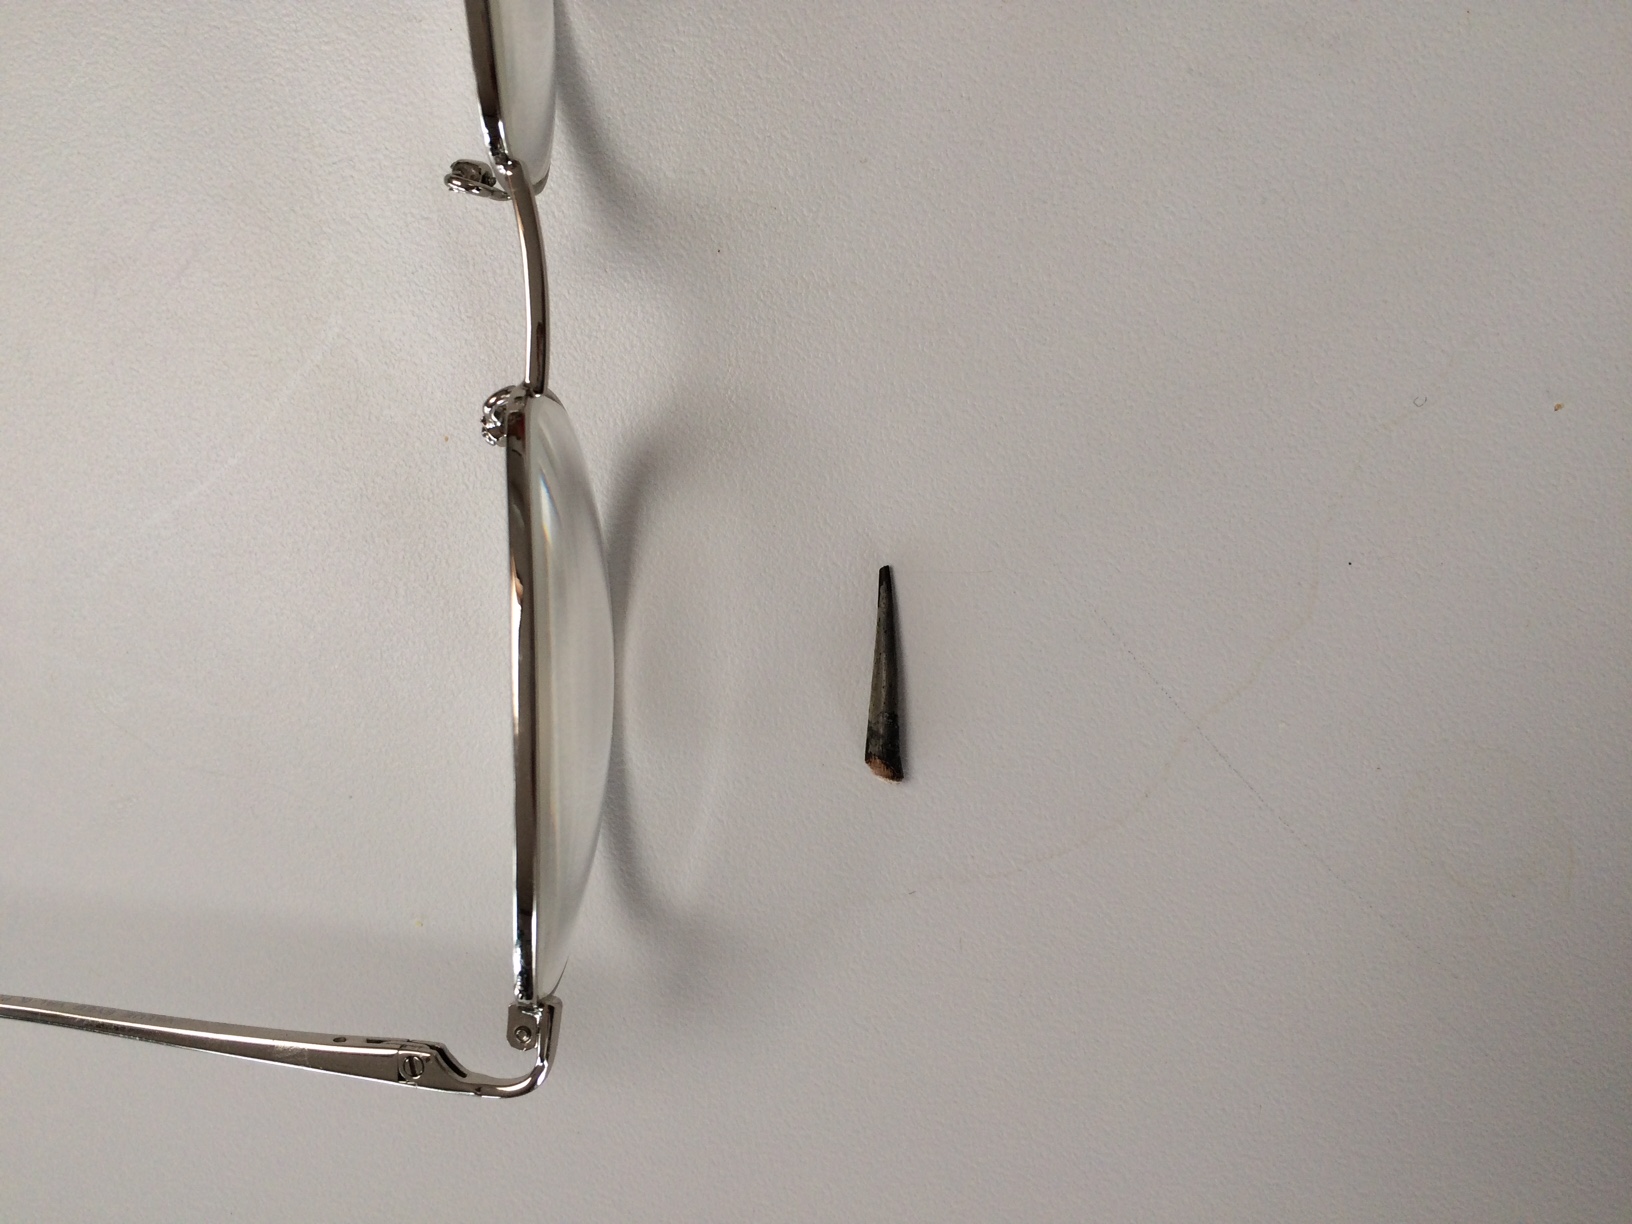
It looks a little like what I think a porcupine quill should look like. I’ve never seen a porcupine quill or a porcupine and I don’t recall hitting one on the trails, but who knows? I’m usually flapping and flailing and bouncing around like a crazy person so I could’ve easily hit some beast without knowing.
Of course on pulling the quill the air whooshed from the tire and it’s now flat.
I began by spinning the wheel to see if any sealant came out through the hole. It didn’t. I added air and spun again, no sealant.
So it seems the shop did a good job and used only a minimal amount of sealant, to keep the weight down.
I undid and removed the valve core and added the contents of the 2 ounce bottle through the valve. I refitted and tightened the core then added a few psi with a floor pump. There’s no need to unseat the tire from the rim during this process so a floor pump works just fine.
I spun the wheel and after a couple revolutions I started to see the white sealant bubbling out through the hole.
A few revs later the stuff stopped bubbling through the hole and the tire was still quite firm. The leak was plugged.
I added more air and spun the tire a few times and voila, job done.
I rode the bike for 2+ hours on some gnarly trail and checked the pressure post-ride – no leak.
I checked it again the following morning (today) and no leak.
I’m confident that if I get a puncture on the trail in future that I should be able to fix it without removing the tire or without even having to remove the valve core. There’s enough sealant inside of the tire to find any holes that might appear, and plug ’em.
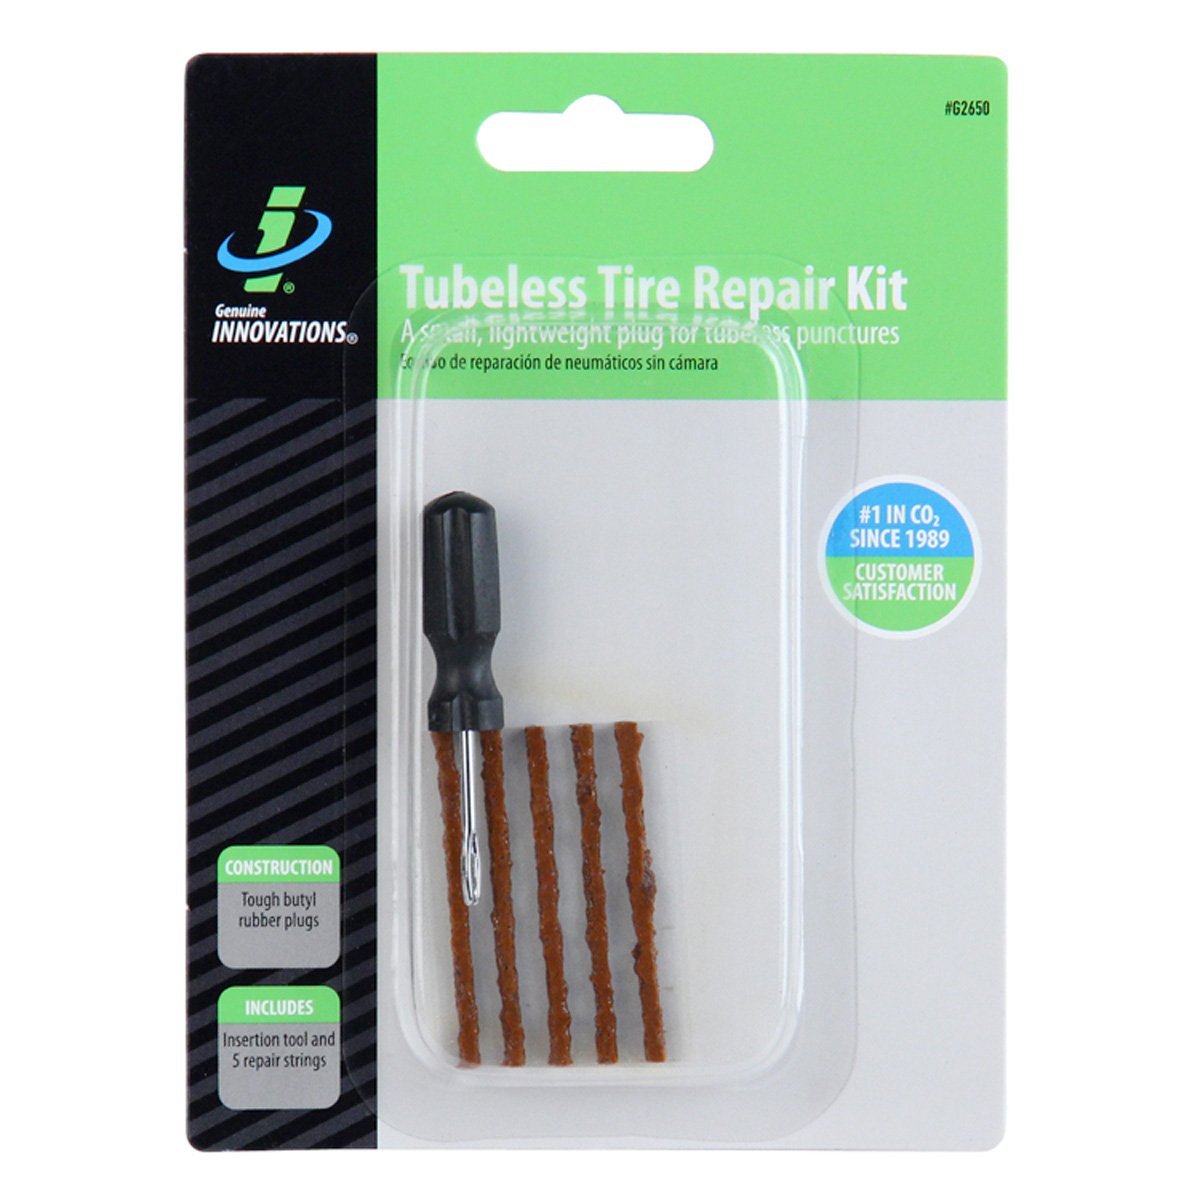 To be safe, and to tackle any larger holes that might happen, I’ve ordered a tubeless plug kit which can go in my toolpack. It’s a basic looking thing where you open up the hole with a small punch then insert the plug and remove the punch leaving the plug behind. Then you let the Stan’s do its job. Here’s the kit on Amazon for a couple bucks
So I can dispense with the tube that I’ve been carrying around, the one that takes up all the room in my saddle bag. I can replace it with a spare bottle of Stan’s and the plug kit, and I’m pretty confident that’s all I will need.
I’m undecided on CO2 versus a pump, so I’ve been carrying both for the time being. Fat tires hold such a high volume of air, even at low psi, that it’s a real pain trying to inflate using a small hand-pump, even a high volume one, which mine is.
Anyway, this is an endorsement for tubeless, for Stan’s sealant and whatever else I’ve mentioned in the preceding. (not porcupines).
FMB
Recent Comments